ATI: 可控视频生成的任意轨迹指令

ATI: 可控视频生成的任意轨迹指令
Angtian Wang, Haibin Huang, Jacob Zhiyuan Fang, Yiding Yang, Chongyang Ma
字节跳动智能创作团队

这是Wan2.1 ATI(可控视频生成的任意轨迹指令)的代码库,一个基于轨迹的运动控制框架,统一了视频生成中的物体、局部和摄像机运动。该代码库基于Wan2.1官方实现。
相比原始Wan2.1,我们新增了以下文件:
- wan/modules/motion_patch.py | 轨迹指令核心模块
- wan/utils/motion.py | 推理数据加载工具
- tools/plot_user_inputs.py | 用户输入轨迹可视化工具
- tools/visualize_trajectory.py | 生成视频可视化工具
- tools/trajectory_editor/ | 交互式轨迹编辑器
- examples/ | 测试示例
- run_example.sh | 简易启动脚本
- wan/image2video.py | 新增加载和解析轨迹的模块 #L256
- wan/configs/__init__.py | 配置ATI相关内容
- generate.py | 新增入口以加载yaml格式推理示例
社区作品
ComfyUI
感谢Kijai开发了ATI的ComfyUI节点: https://github.com/kijai/ComfyUI-WanVideoWrapperFP8量化Huggingface模型:https://huggingface.co/Kijai/WanVideo_comfy/blob/main/Wan2_1-I2V-ATI-14B_fp8_e4m3fn.safetensors
指南
Benji的使用指南:https://www.youtube.com/watch?v=UM35z2L1XbI安装
ATI需要与官方Wan 2.1相同的环境。请按照INSTALL.md(Wan2.1)的说明进行安装。
git clone https://github.com/bytedance/ATI.git
cd ATIpip install .huggingface-cli download Wan-AI/Wan2.1-I2V-14B-480P --local-dir ./Wan2.1-I2V-14B-480Phuggingface-cli download bytedance-research/ATI --local-dir ./Wan2.1-ATI-14B-480Pcp ./Wan2.1-I2V-14B-480P/Wan2.1_VAE.pth ./Wan2.1-ATI-14B-480P/
cp ./Wan2.1-I2V-14B-480P/models_t5_umt5-xxl-enc-bf16.pth ./Wan2.1-ATI-14B-480P/
cp ./Wan2.1-I2V-14B-480P/models_clip_open-clip-xlm-roberta-large-vit-huge-14.pth ./Wan2.1-ATI-14B-480P/
cp -r ./Wan2.1-I2V-14B-480P/xlm-roberta-large ./Wan2.1-ATI-14B-480P/
cp -r ./Wan2.1-I2V-14B-480P/google ./Wan2.1-ATI-14B-480P/Run
We provide a demo sript to run ATI.
bash run_example.sh -p examples/test.yaml -c ./Wan2.1-ATI-14B-480P -o samples-p 是配置文件的路径,-c 是检查点文件的路径,-o 是输出目录的路径,-g 定义使用的 GPU 数量(如果未指定,将使用所有可用 GPU;如果给定 1,则以单进程模式运行)。完成后,您将看到以下内容:
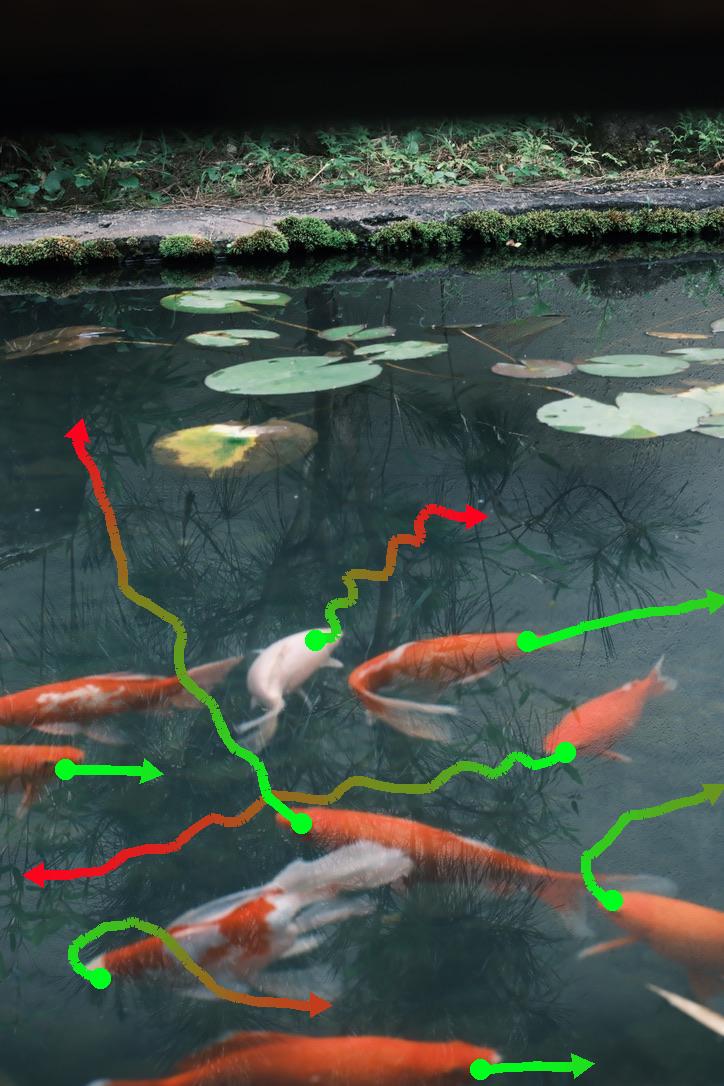
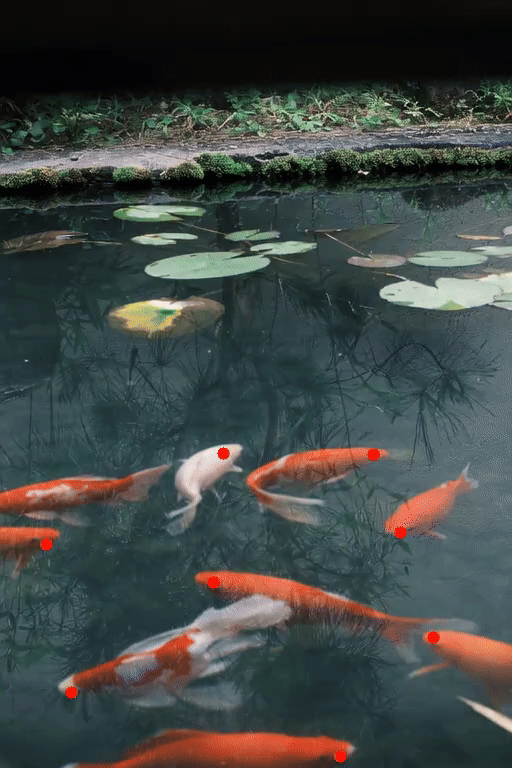
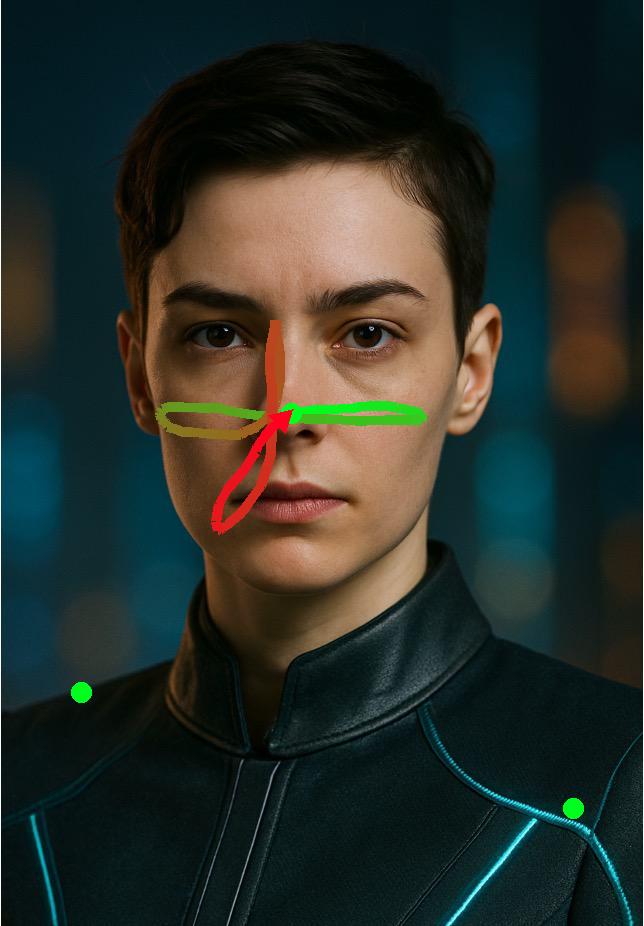
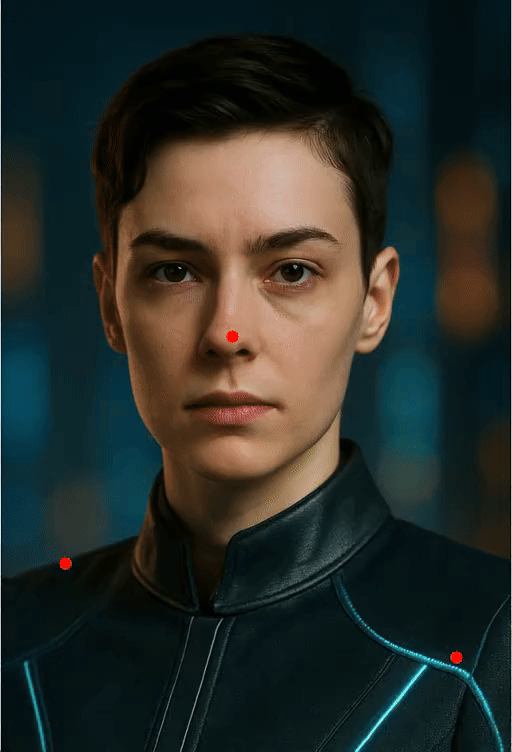
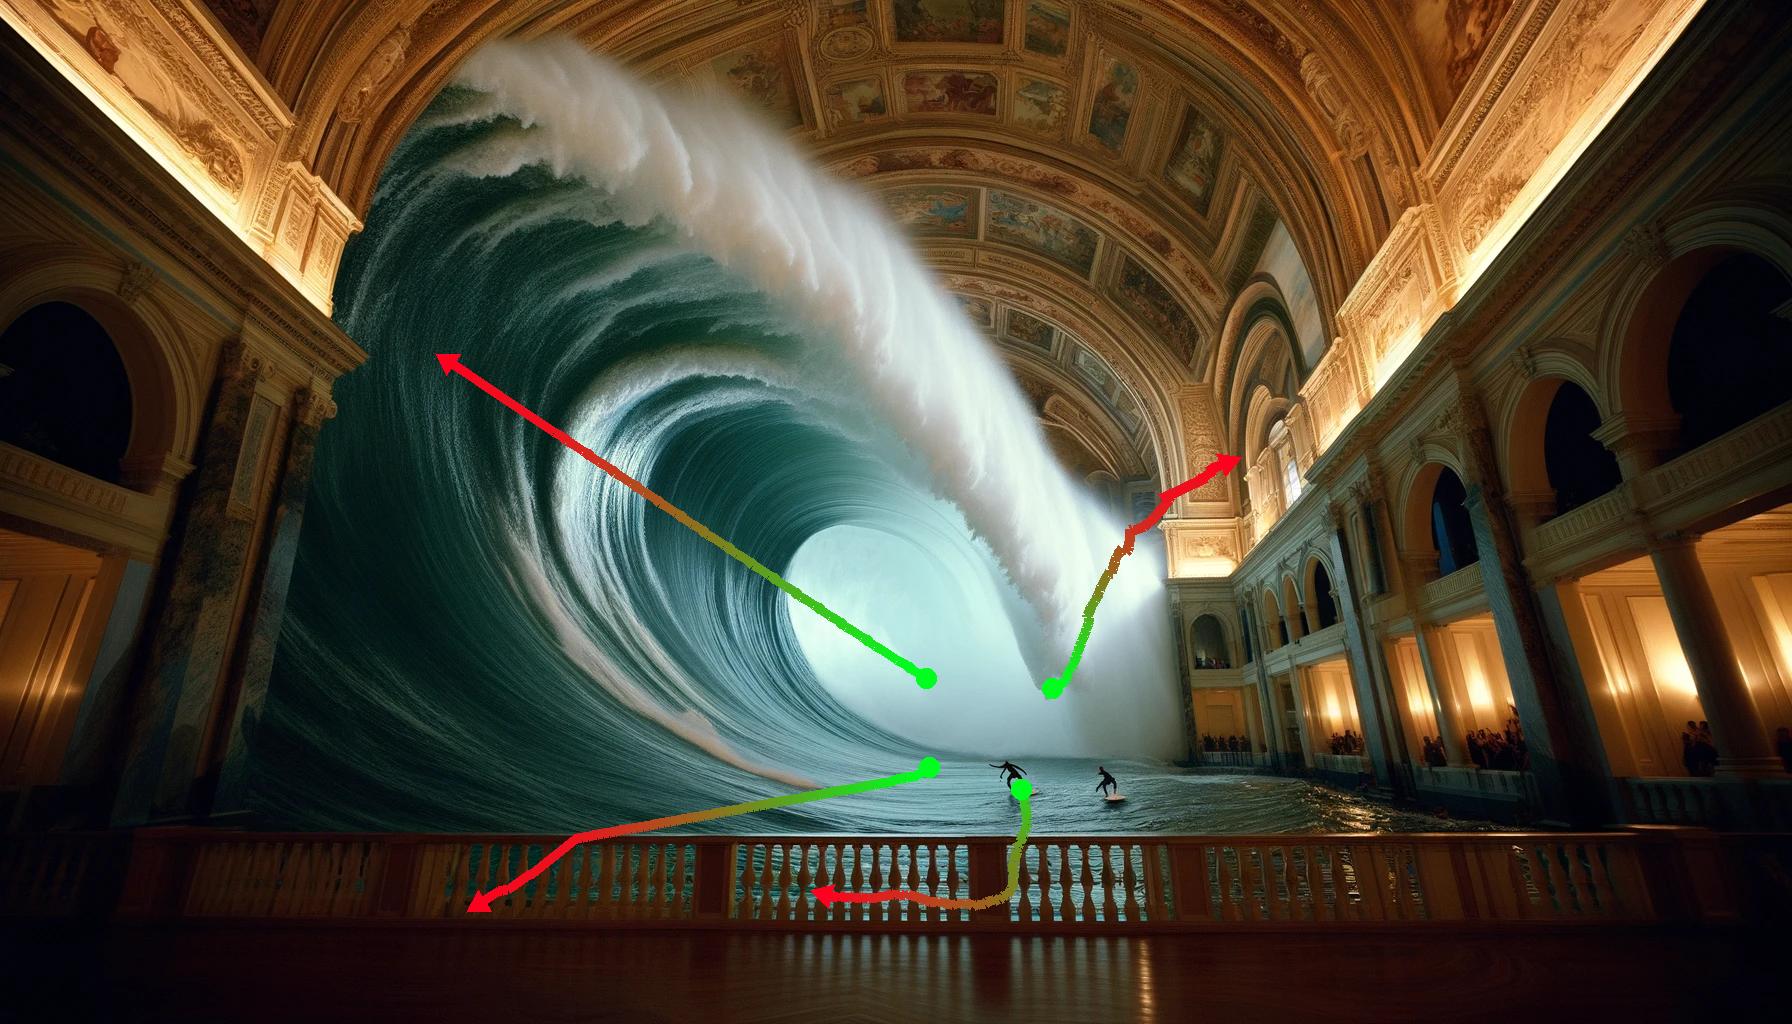
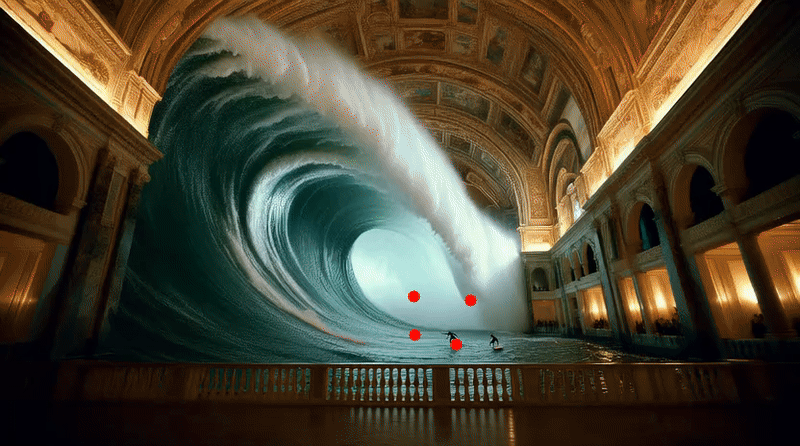
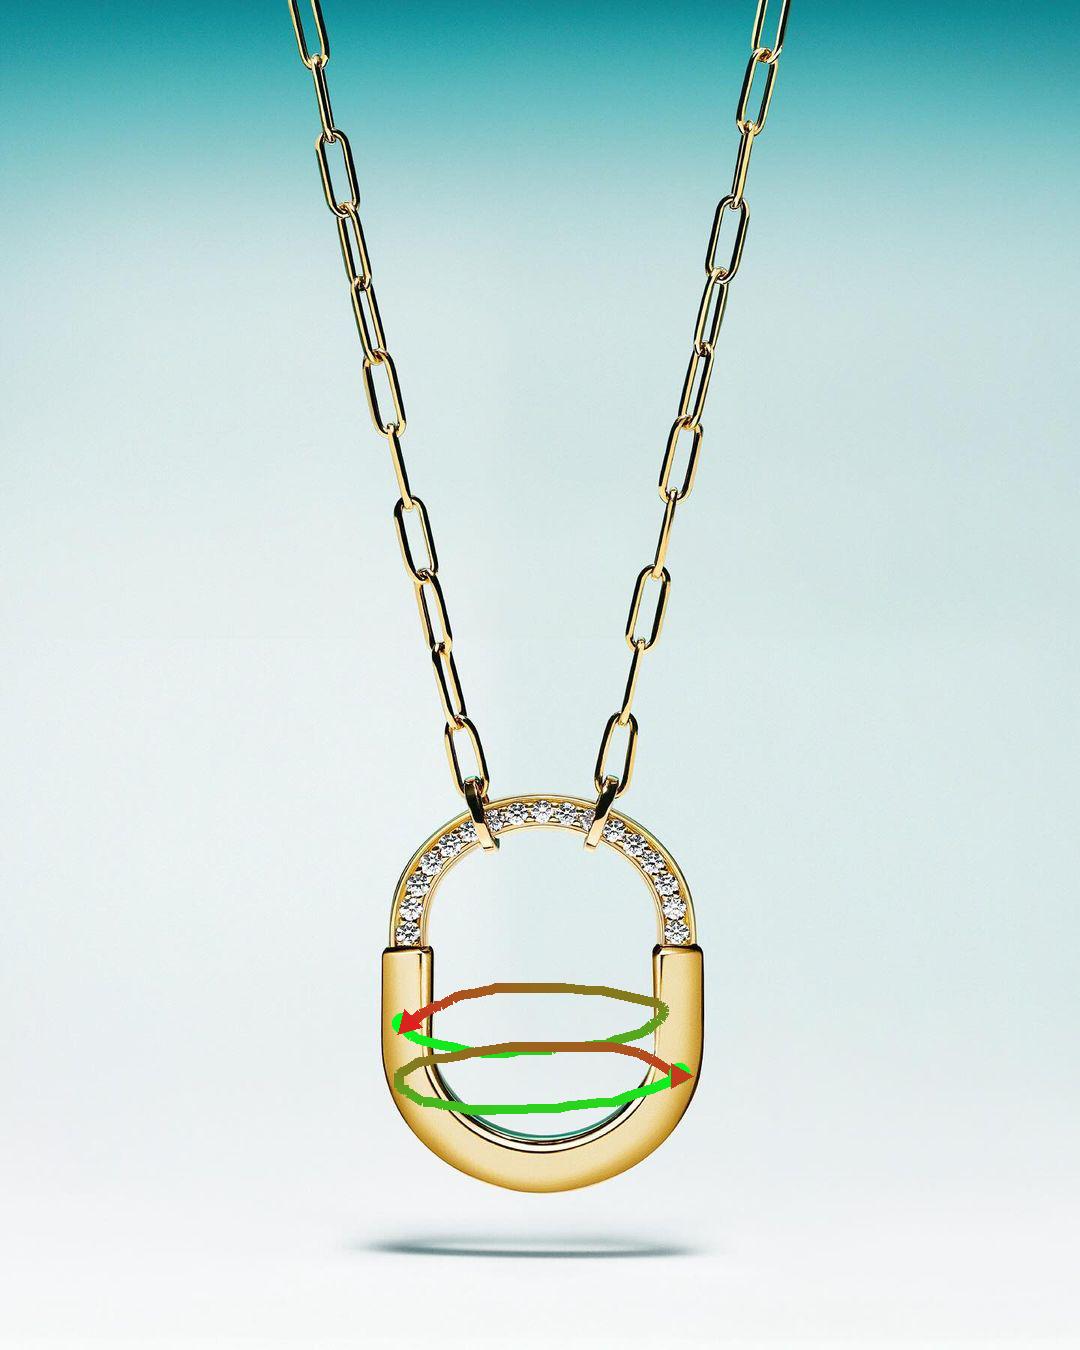
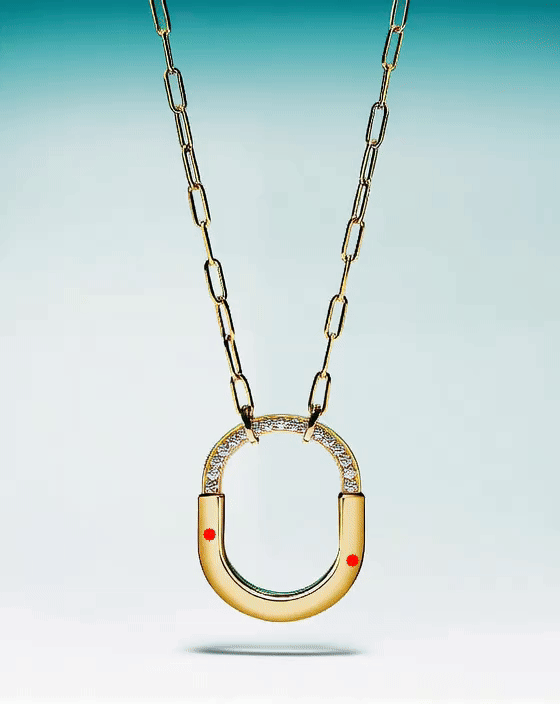
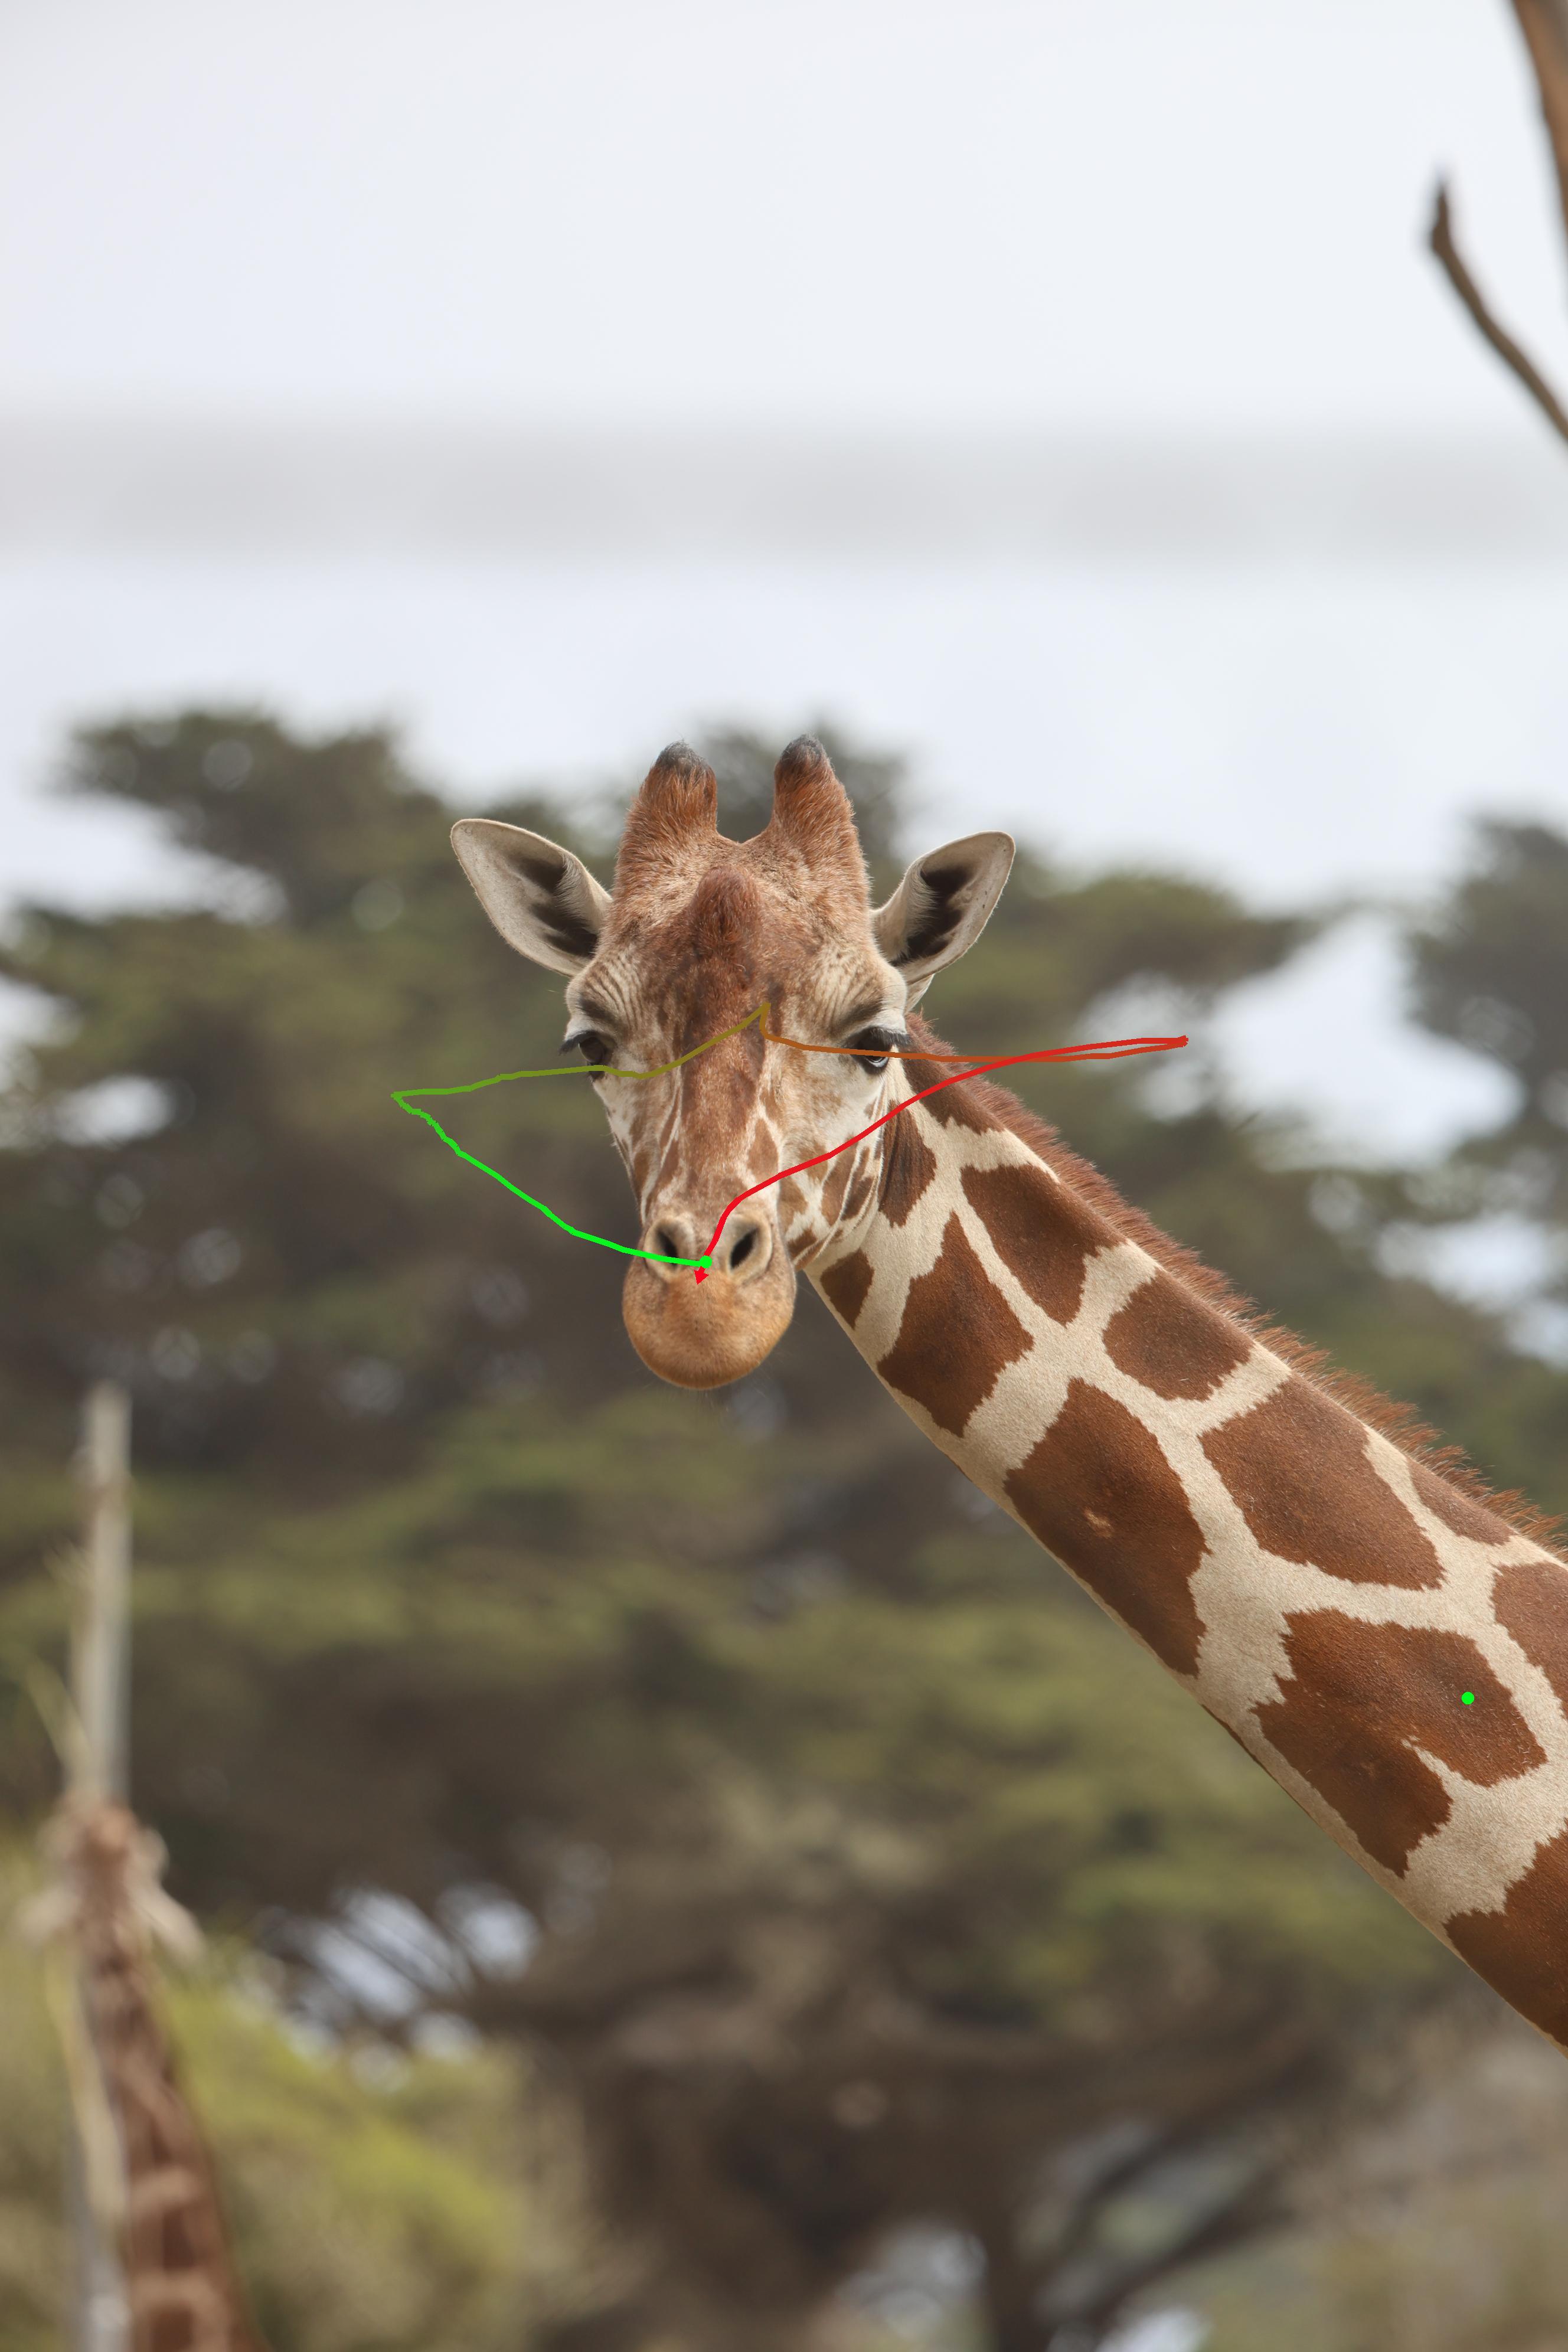
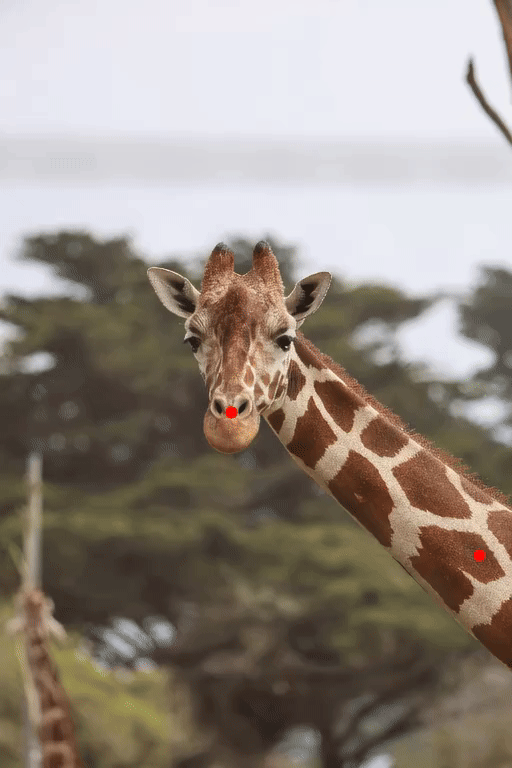
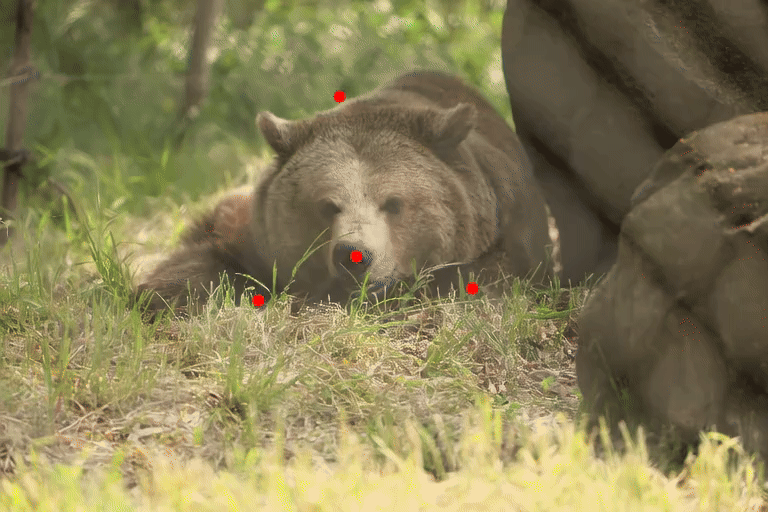
samples/outputs目录下是原始输出视频。samples/images_tracks显示输入图像及用户指定的轨迹。samples/outputs_vis显示输出视频及用户指定的轨迹。
| 输入图像及轨迹 | 生成的视频(叠加轨迹) |
|---|---|
|
|
|
|
|
|
|
|
|
|

|
|
创建您自己的轨迹
我们提供了一个交互式工具,允许用户在图像上绘制和编辑轨迹。
- 首先运行:
cd tools/trajectory_editor
python3 app.pylocalhost with the server's IP address.- Get the interface shown below, then click Choose File to open a local image.
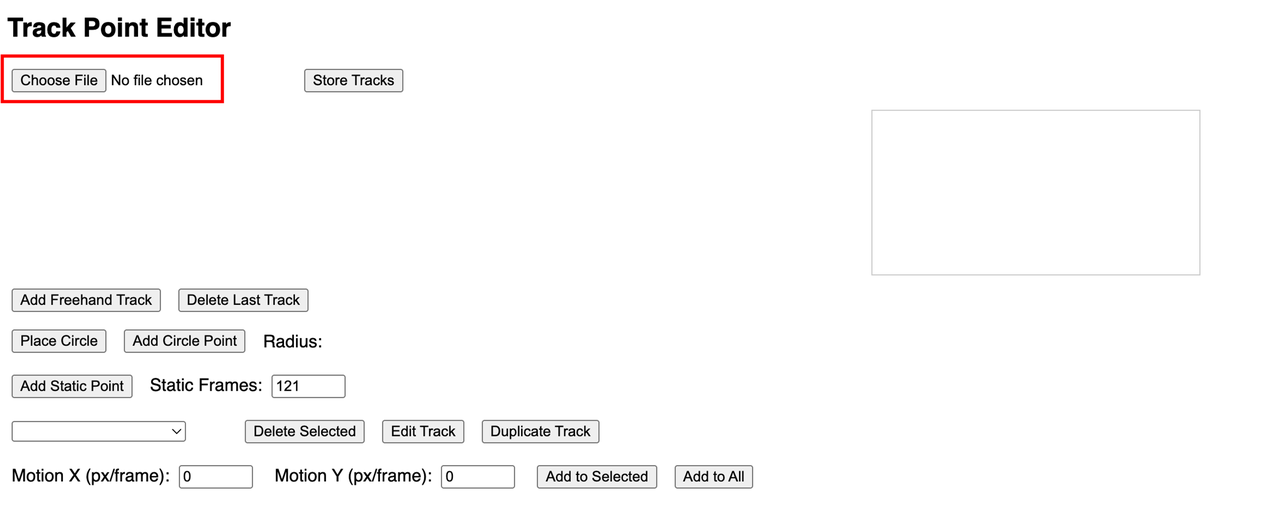
- Available trajectory functions:
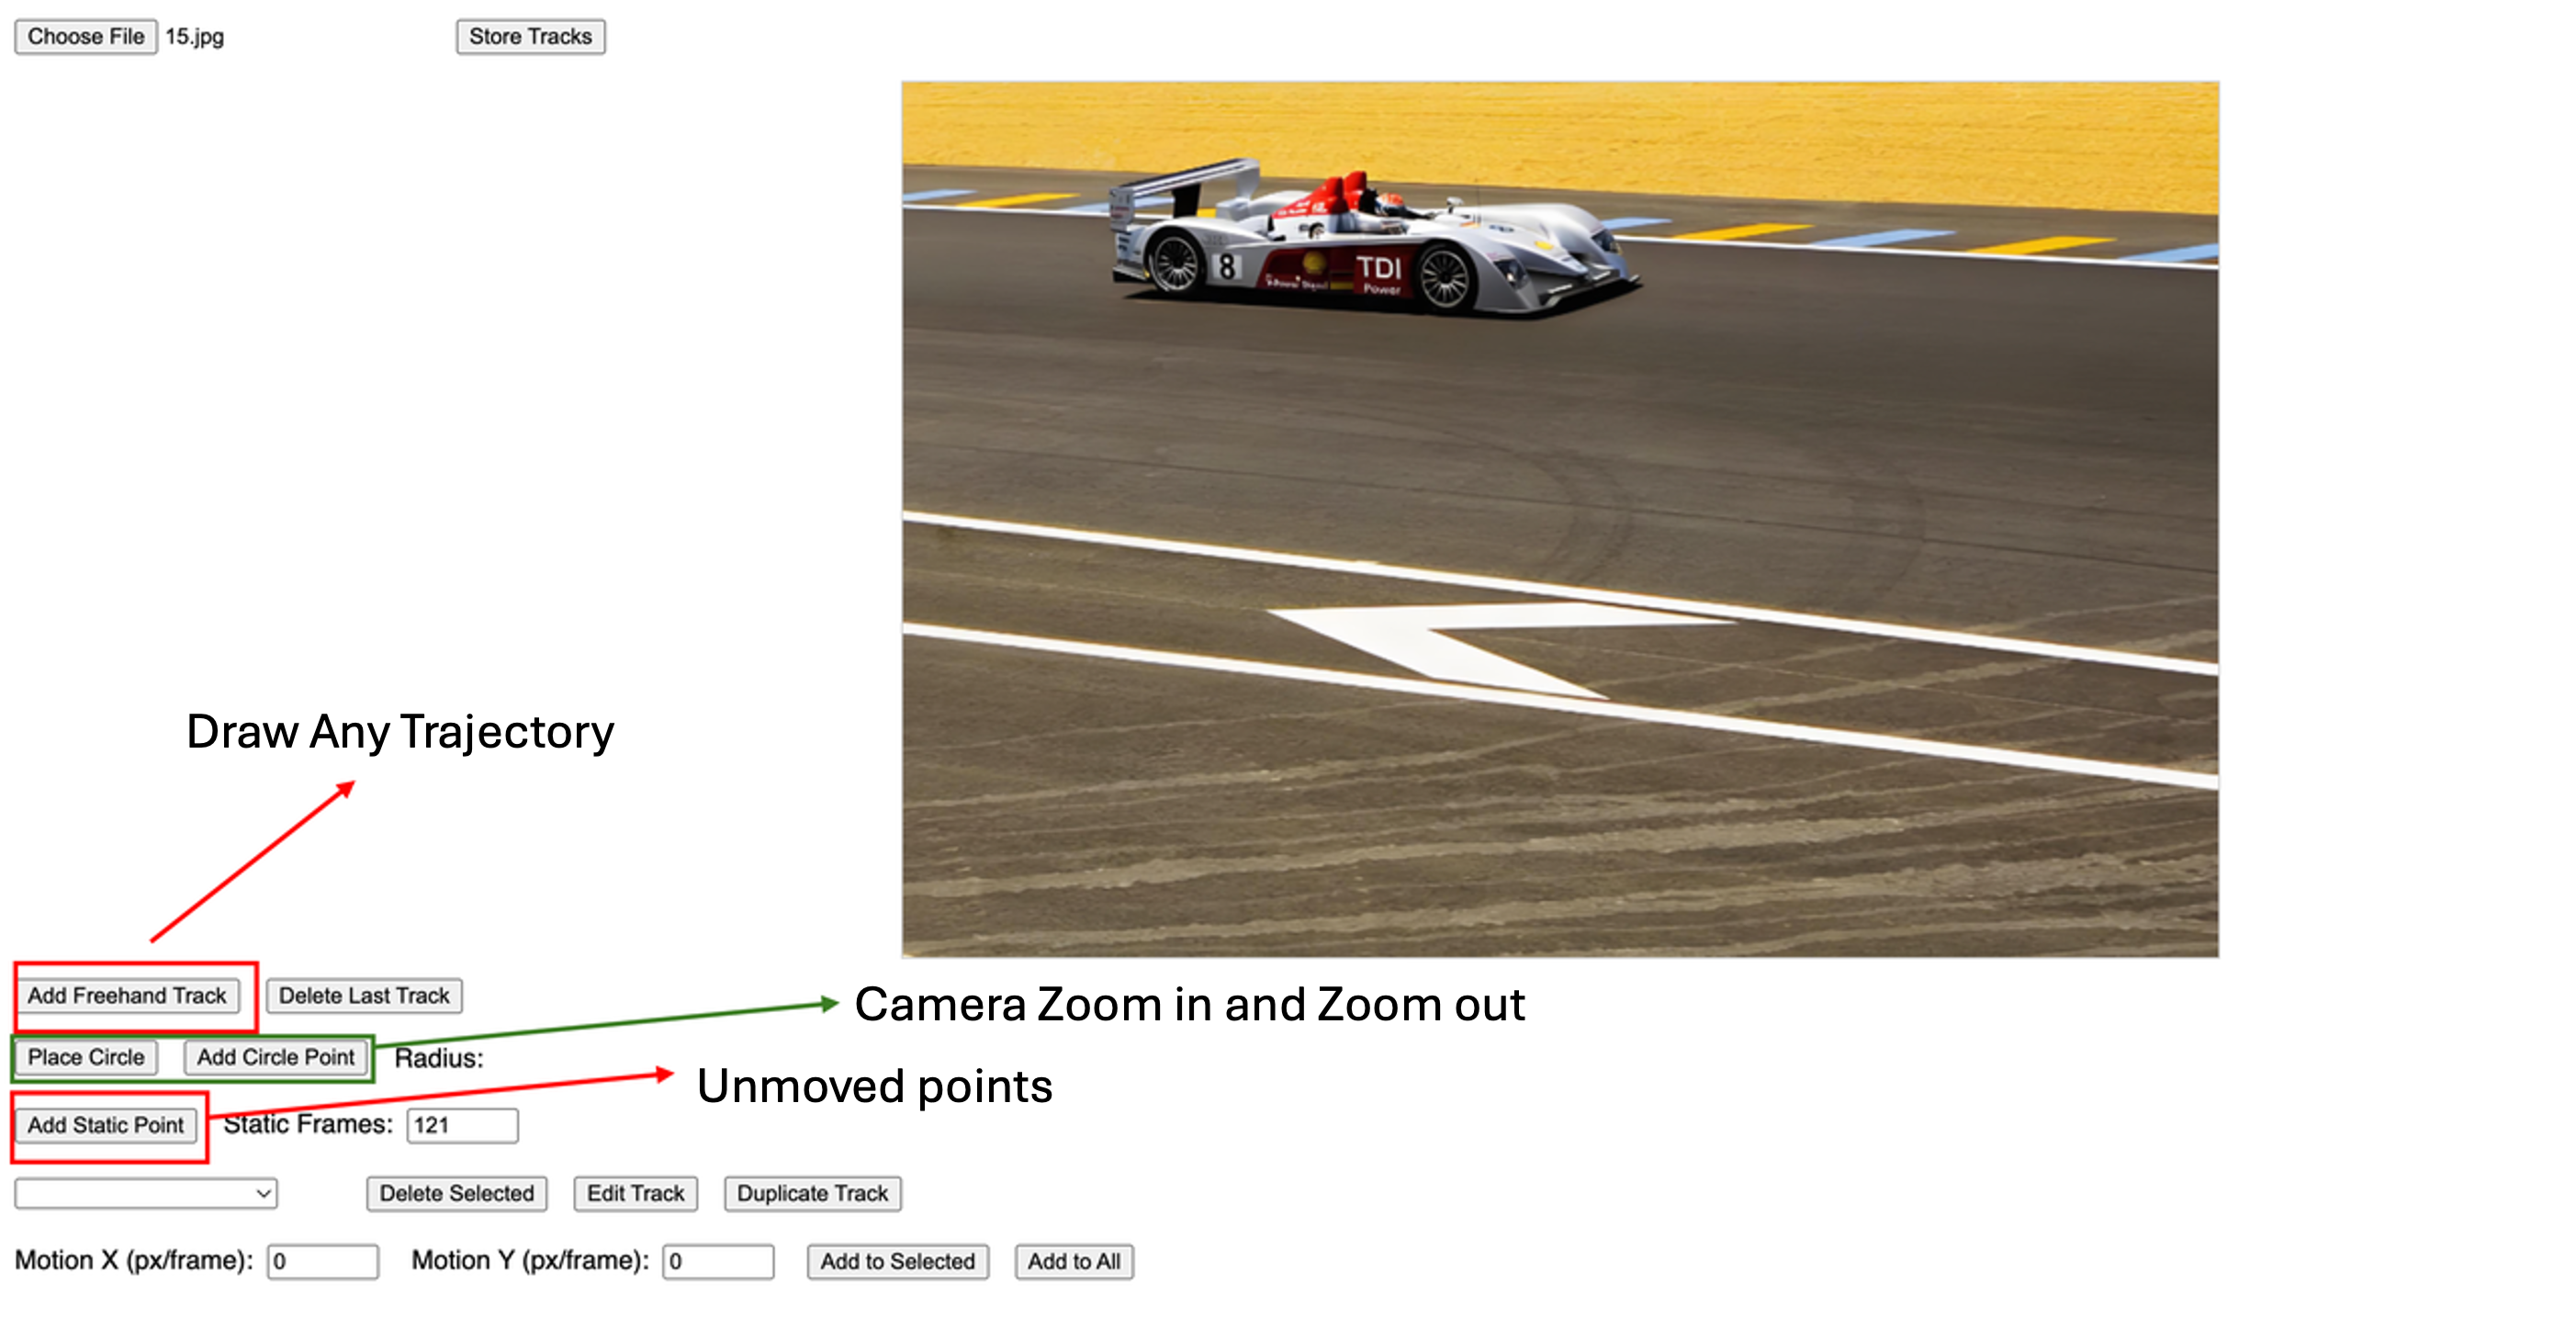
a. Free Trajectory: Click and then drag with the mouse directly on the image. b. Circular (Camera Control):
- Place a circle on the image, then drag to set its size for frame 0.
- Place a few (3–4 recommended) track points on the circle.
- Drag the radius control to achieve zoom-in/zoom-out effects.
Note: Pay attention to the progress bar in the box to control motion speed.
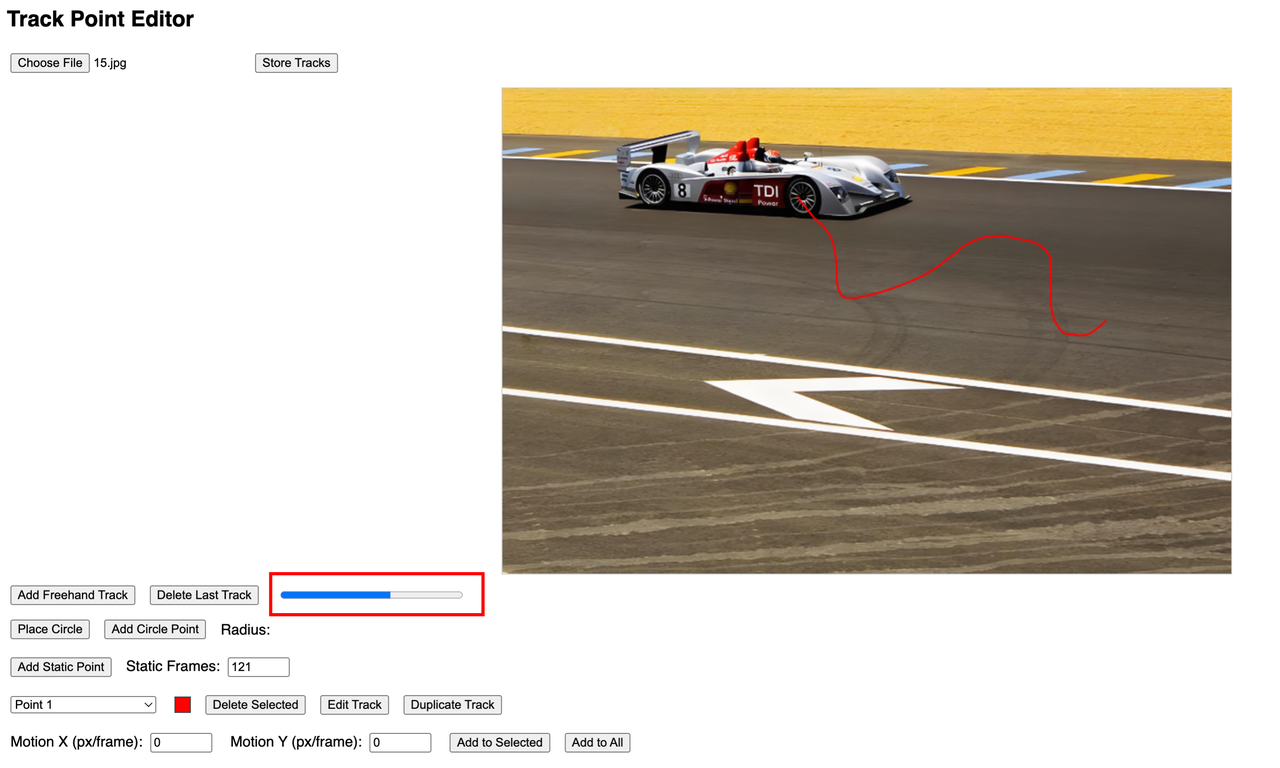
- Trajectory Editing: Select a trajectory here, then delete, edit, or copy it. In edit mode, drag the trajectory directly on the image. The selected trajectory is highlighted by color.

- Camera Pan Control: Enter horizontal (X) or vertical (Y) speed (pixels per frame). Positive X moves right; negative X moves left. Positive Y moves down; negative Y moves up. Click Add to Selected to apply to the current trajectory, or Add to All to apply to all trajectories. The selected points will gain a constant pan motion on top of their existing movement.

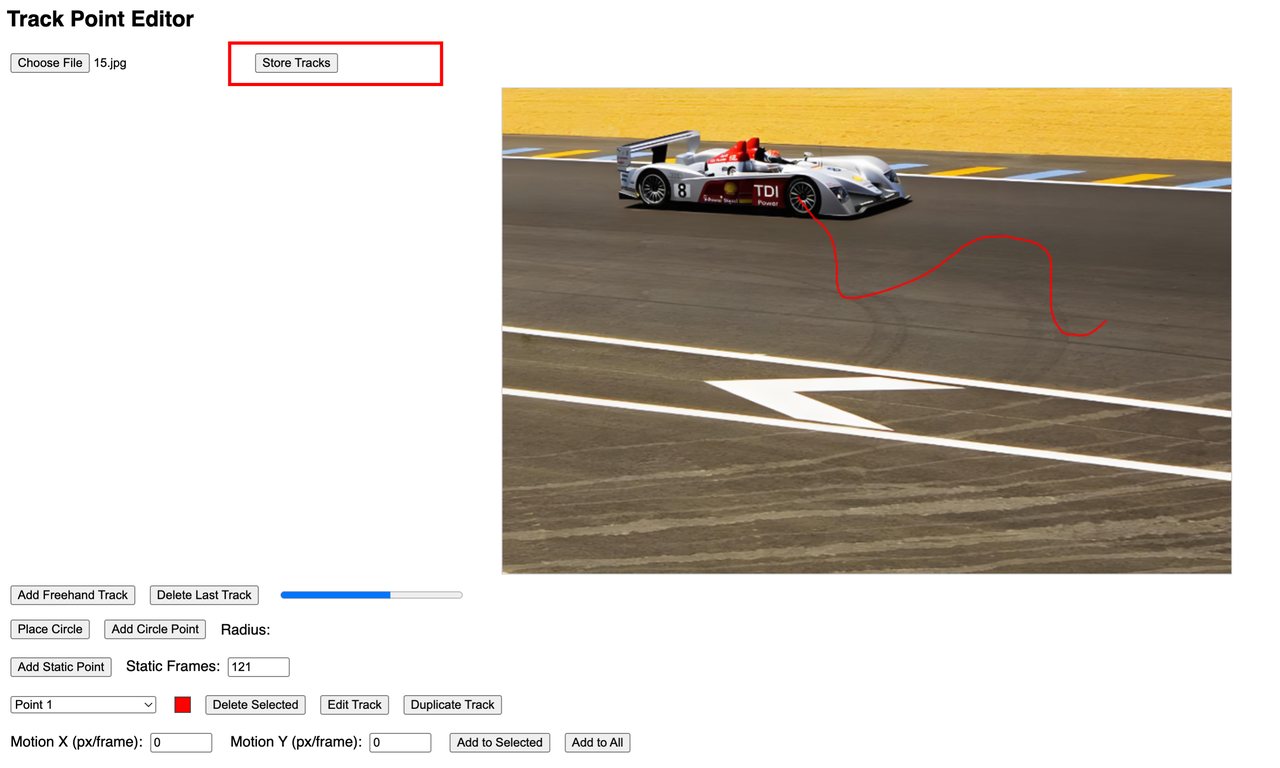
- Important: After editing, click Store Tracks to save. Each image (not each trajectory) must be saved separately after drawing all trajectories.
- Once all edits are complete, locate the
videos_examplefolder in the Trajectory Editor.
Citation
Please cite our paper if you find our work useful:@article{wang2025ati,
title={{ATI}: Any Trajectory Instruction for Controllable Video Generation},
author={Wang, Angtian and Huang, Haibin and Fang, Zhiyuan and Yang, Yiding, and Ma, Chongyang}
journal={arXiv preprint},
volume={arXiv:2505.22944},
year={2025}
}--- Tranlated By Open Ai Tx | Last indexed: 2025-07-19 ---