OCI2Git
[![]() ][documentation]
][documentation]


[//]: # (为未来的 test.yaml 预留的 mock) [//]: # ([](https://github.com/Virviil/oci2git/actions))
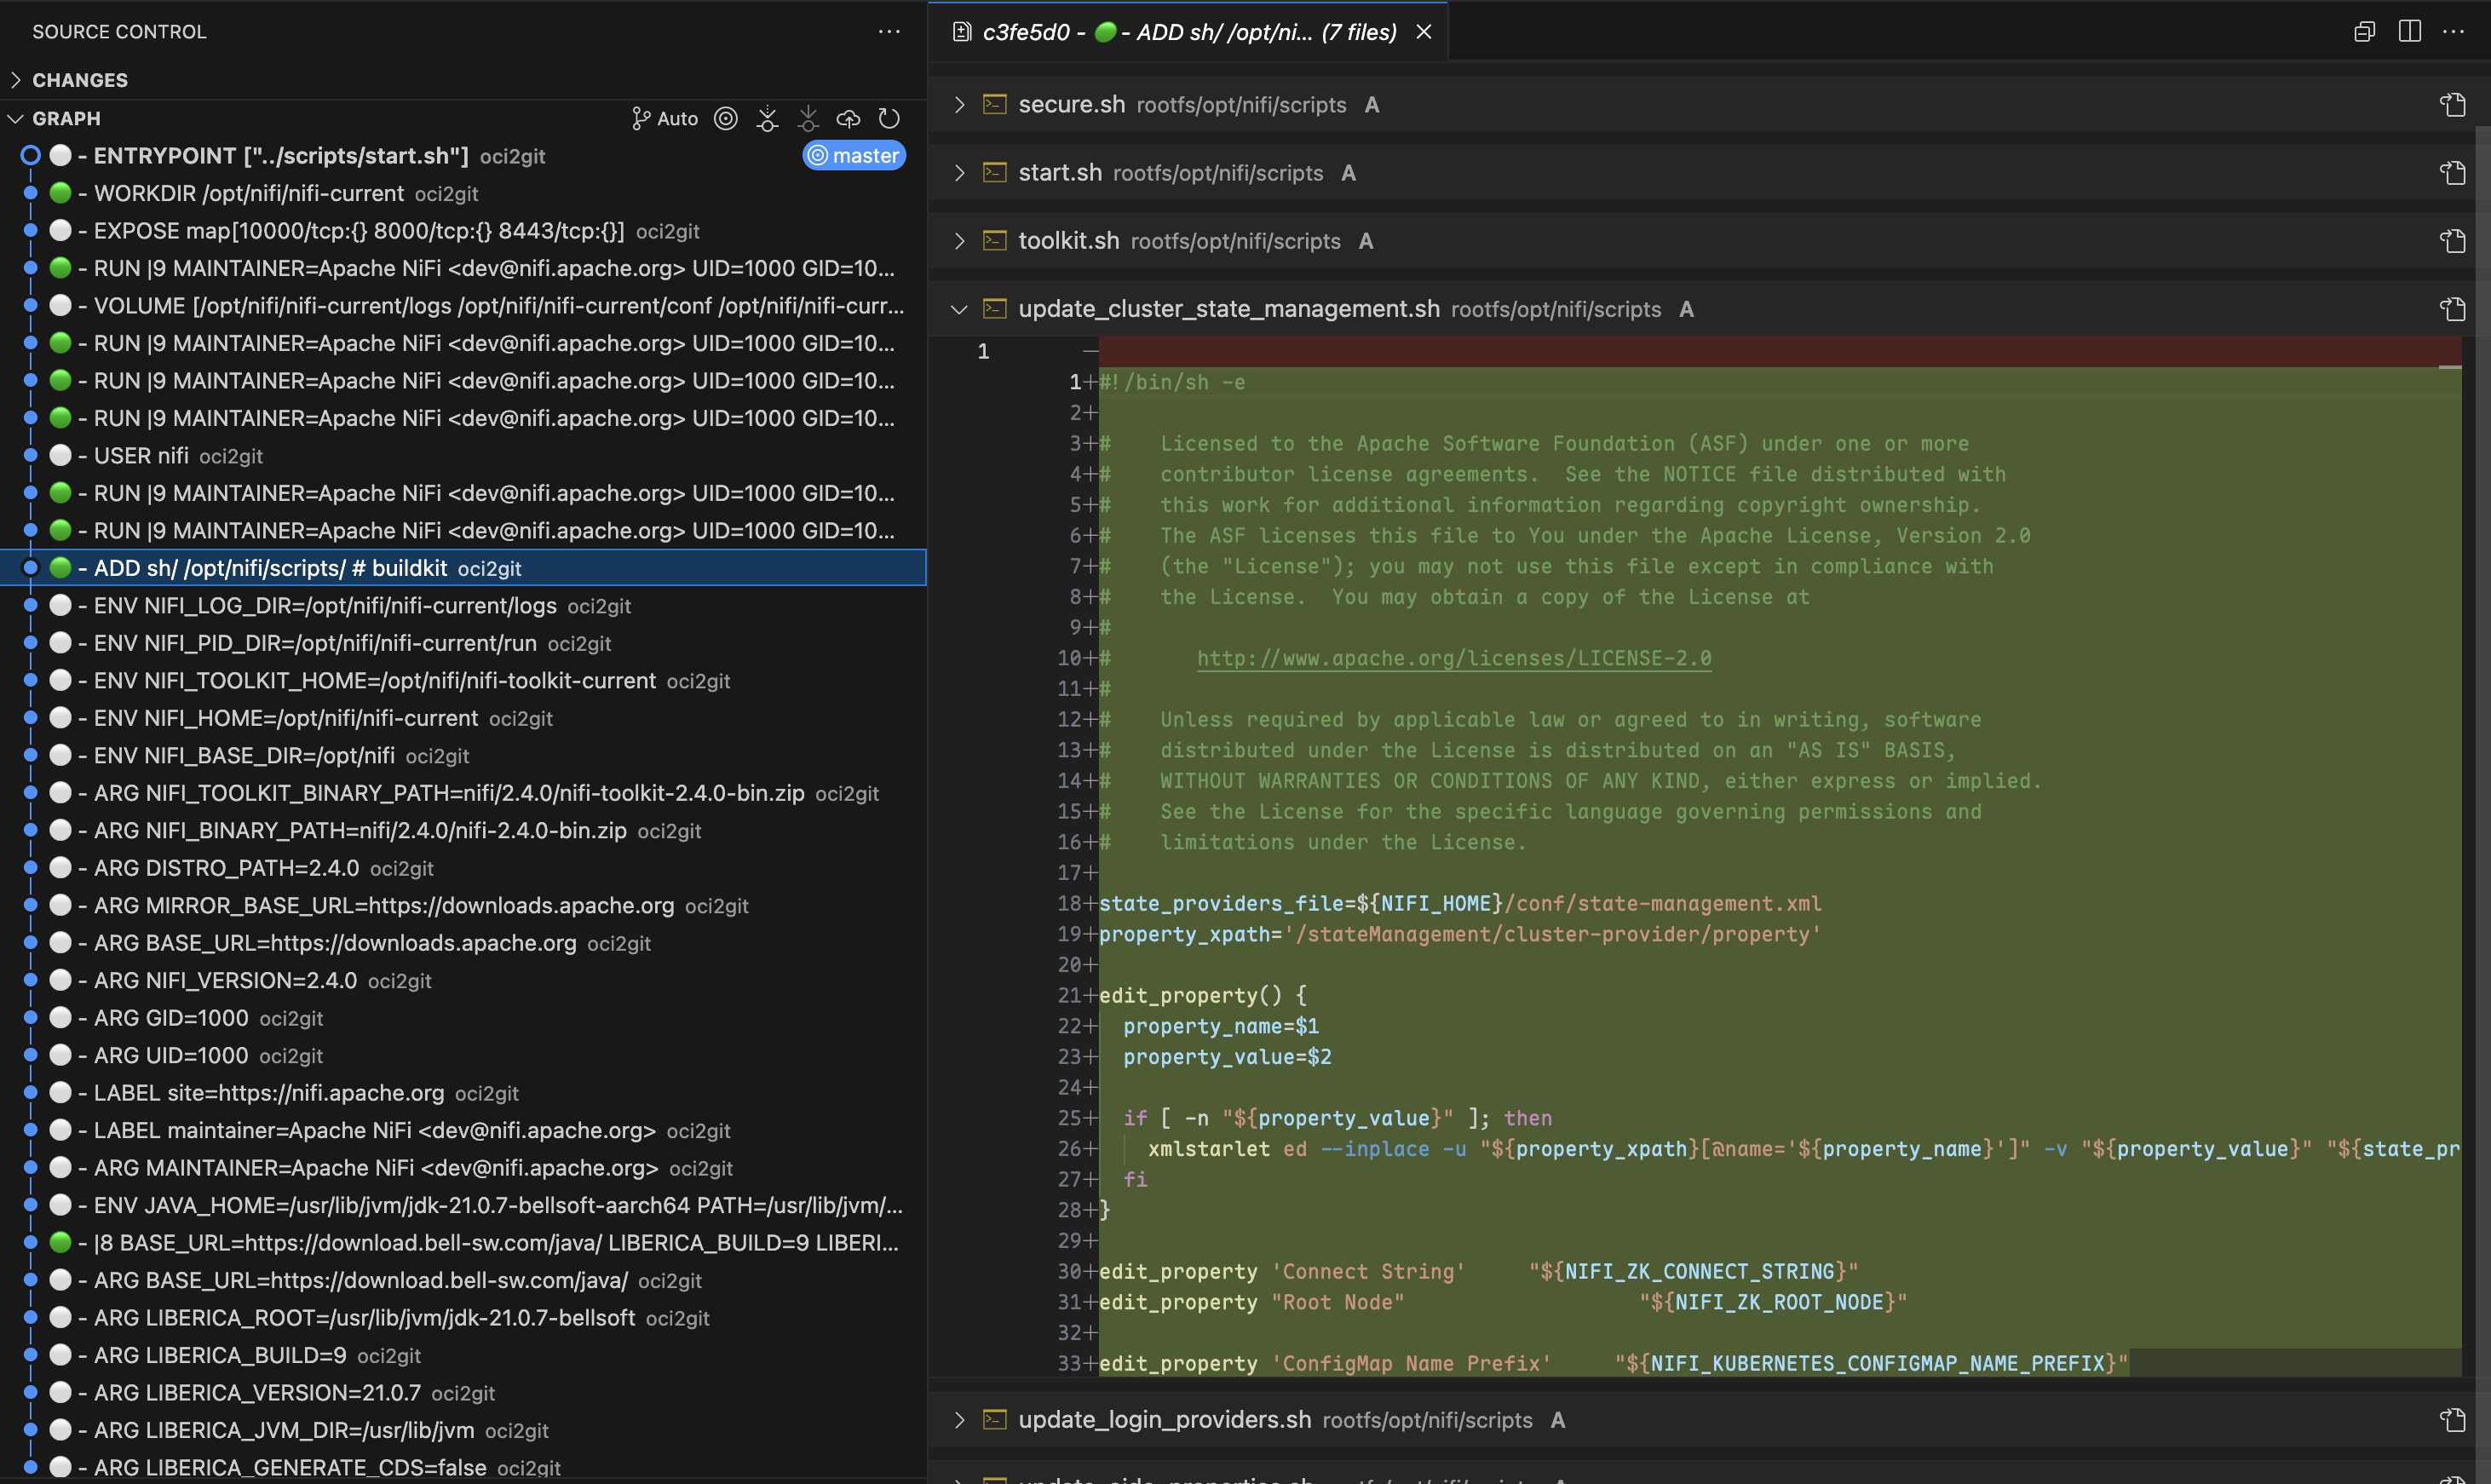
这是一个 Rust 应用程序,可将容器镜像(如 Docker 等)转换为 Git 仓库,并以 YAML 生成文件系统物料清单(fsbom)。每个容器层被表示为一个 Git 提交,保留原始镜像的历史和结构。

功能特性
- 分析 Docker 镜像并提取层信息
- 创建一个 Git 仓库,每个镜像层作为一次提交
- 生成每层文件清单的 YAML 文件系统物料清单(fsbom)
- 支持空层(如 ENV、WORKDIR 等)以空提交形式存在
- 完整的元数据提取为 Markdown 格式
- 可扩展架构以支持不同的容器引擎
使用场景
层级差异对比
在排查容器问题时,可以利用 Git 强大的差异对比功能,准确识别任意两层之间的变更内容。通过在提交间运行git diff,工程师可以精确看到哪些文件被添加、修改或删除,大大简化了理解每条 Dockerfile 指令影响和定位问题变更的过程。
源头追踪
通过使用git blame,开发者可以快速确定是哪个层引入了某个特定文件或代码行。这在排查配置文件或依赖项问题时尤其有价值。无需手动检查每一层,您可以直接追溯任意文件的来源层及对应的 Dockerfile 指令。文件生命周期追踪
OCI2Git 让您能够跟踪特定文件在容器镜像历史中的变化历程。您可以观察文件最初何时被创建、在各层中如何被修改以及是否/何时被删除。这种全景视角帮助理解文件的演变,无需手动追踪数十层的变更。要在容器镜像中追踪某个文件的历史(包括首次出现、被修改或删除的时间),转换完成后可使用以下 Git 命令:
# Full history of a file (including renames)
git log --follow -- /rootfs/my/file/pathFirst appearance (i.e. creation) - see which layer introduced the file
git log --diff-filter=A -- /rootfs/my/file/pathAll changes made to the file (with diffs)
git log -p --follow -- /rootfs/my/file/pathWhen the file was deleted
git log --diff-filter=D -- /rootfs/my/file/pathShow short commit info (concise layer history)
git log --follow --oneline -- /rootfs/my/file/path多层分析
有时,最有洞察力的比较来自于检查多个非连续层之间的变化。使用 OCI2Git,您可以利用 Git 的比较工具分析组件在多个构建阶段的演变,识别仅通过观察相邻层无法发现的模式。层探索
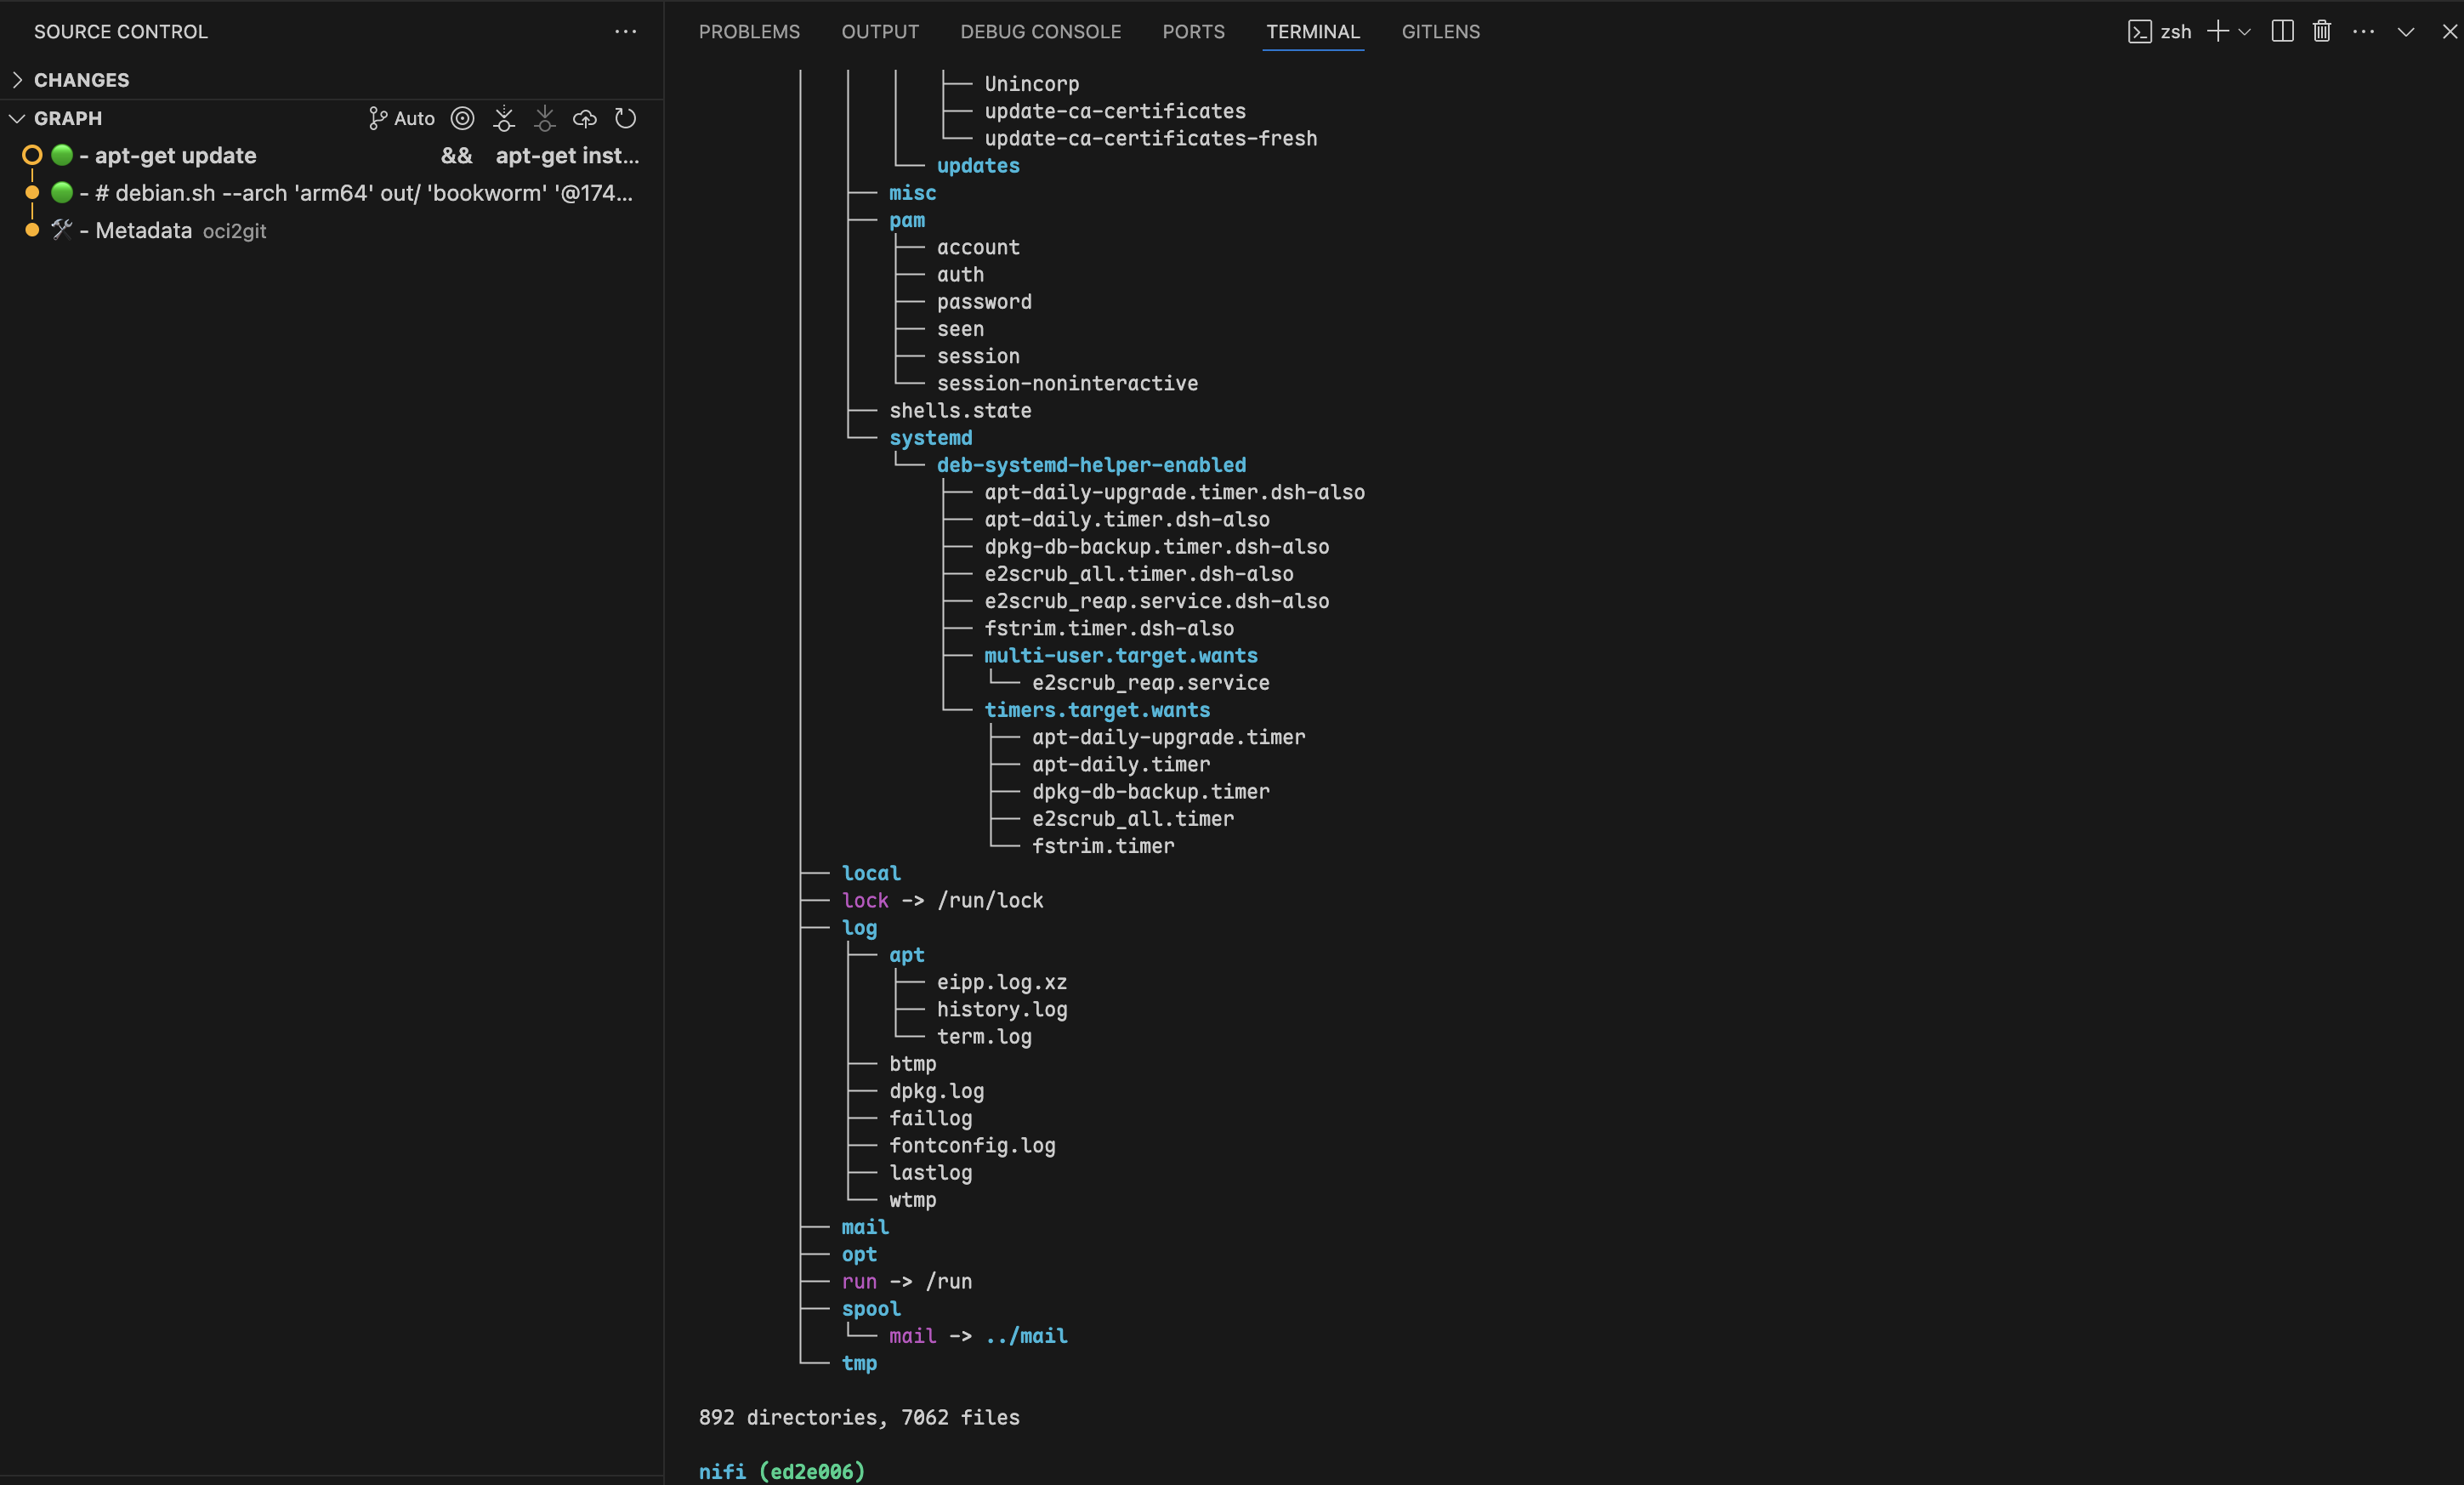
通过使用git checkout 切换到任意特定提交,您可以检查容器文件系统在该层的确切状态。这样开发者就能在镜像创建过程中的任意时点检查文件和目录的精确状态,在调试或分析容器行为时提供宝贵的上下文。
多镜像分析
在处理具有共同祖先的多个容器镜像时,OCI2Git 仅在镜像实际分叉时智能创建分支。这样,您可以在单一仓库中分析多个相关镜像,同时保留它们的共同历史。
# Convert first image to create the base repository
oci2git postgres:16.9-alpine3.21 -o alpConvert second image to the same output folder
oci2git nginx:1.28.0-alpine-slim -o alp- 包含所有共享层的公共主干
- 只有在镜像实际不同时才分叉的独立分支
- 清晰可视化镜像共享共同祖先和变为唯一的节点
- 智能重复处理:如果完全相同的镜像被处理两次,算法会在最终元数据提交前检测到,并跳过创建重复分支
- 镜像家族分析:了解镜像的不同变体(不同版本、架构或配置)之间的关系
- 基础镜像影响:精准查看基础镜像的更改如何影响多个派生镜像
- 优化机会:识别可以在镜像变体间更好利用的共享组件

其他使用场景
- 安全审计:精准识别何时引入了有漏洞的包或配置,并追溯到具体的构建指令。
- 镜像优化:分析层结构以发现可合并的冗余操作或大文件,帮助减小镜像体积。
- 依赖管理:监控依赖在镜像历史中的添加、升级或移除时间。
- 构建过程改进:检查层组成以优化 Dockerfile 指令,实现更好的缓存和更小的镜像体积。
- 跨镜像对比:将多个相关镜像转换为 Git 仓库,并使用 Git 的对比工具分析它们的差异与共性。
安装
包管理器
#### macOS / Linux (Homebrew)
brew tap virviil/oci2git
brew install oci2git
#### Debian / Ubuntu
从最新发布下载并安装 .deb 包:
# For amd64 (x86_64)
wget https://github.com/virviil/oci2git/releases/latest/download/oci2git_VERSION_amd64.deb
sudo dpkg -i oci2git_VERSION_amd64.debFor arm64
wget https://github.com/virviil/oci2git/releases/latest/download/oci2git_VERSION_arm64.deb
sudo dpkg -i oci2git_VERSION_arm64.deb
#### Arch Linux(AUR)
# Using yay
yay -S oci2git-binUsing paru
paru -S oci2git-binManual installation
git clone https://aur.archlinux.org/oci2git-bin.git
cd oci2git-bin
makepkg -si
预编译二进制文件
从最新发布版本下载适合您平台的二进制文件:
# Linux x86_64
wget https://github.com/virviil/oci2git/releases/latest/download/oci2git-linux-x86_64.tar.gz
tar xzf oci2git-linux-x86_64.tar.gz
sudo mv oci2git-linux-x86_64 /usr/local/bin/oci2git
chmod +x /usr/local/bin/oci2gitmacOS (Apple Silicon)
wget https://github.com/virviil/oci2git/releases/latest/download/oci2git-darwin-aarch64.tar.gz
tar xzf oci2git-darwin-aarch64.tar.gz
sudo mv oci2git-darwin-aarch64 /usr/local/bin/oci2git
chmod +x /usr/local/bin/oci2git
来自 Crates.io
cargo install oci2git来自源头
# Clone the repository
git clone https://github.com/virviil/oci2git.git
cd oci2gitInstall locally
cargo install --path .
用法
oci2git [OPTIONS]
oci2git convert [OPTIONS]
oci2git fsbom [OPTIONS]
convert — OCI镜像 → Git仓库
oci2git convert [OPTIONS]
or simply:
oci2git
选项:
-o, --output Git仓库的输出目录 [默认值: ./container_repo]
-e, --engine 要使用的容器引擎(docker, nerdctl, tar)[默认值: docker]
-v, --verbose 详细模式(-v为信息,-vv为调试,-vvv为跟踪)
fsbom — 文件系统物料清单
oci2git fsbom [OPTIONS] 选项:
-o, --output YAML BOM 文件的输出路径 [默认值: ./fsbom.yml]
-e, --engine 要使用的容器引擎(docker、nerdctl、tar)[默认值: docker]
-v, --verbose 详细模式(-v 表示信息,-vv 表示调试,-vvv 表示跟踪)
环境变量:
TMPDIR 设置此环境变量以更改用于中间数据处理的默认位置。此设置依赖于平台(例如,Unix/macOS 上为 TMPDIR,Windows 上为 TEMP 或 TMP)。
示例
转换
使用 Docker 引擎(默认):
oci2git ubuntu:latest
or explicitly:
oci2git convert ubuntu:latest -o ./ubuntu-repo
使用已下载的镜像 tar 包:
oci2git convert -e tar -o ./ubuntu-repo /path/to/ubuntu-latest.tartar 引擎期望一个有效的 OCI 格式 tar 包,通常使用 docker save 创建:
# Create a tarball from a local Docker image
docker save -o ubuntu-latest.tar ubuntu:latestConvert the tarball to a Git repository
oci2git convert -e tar -o ./ubuntu-repo ubuntu-latest.tar
这将在 ./ubuntu-repo 中创建一个 Git 仓库,包含以下内容:
Image.md- 关于镜像的完整元数据,采用 Markdown 格式rootfs/- 来自容器的文件系统内容
- 第一次提交仅包含带有完整元数据的
Image.md文件 - 每个后续提交代表原始镜像中的一个层
- 提交信息包含 Dockerfile 命令作为提交消息
文件系统物料清单(fsbom)
生成一个 YAML,列出每一层引入或修改的所有文件:
oci2git fsbom ubuntu:latest -o ubuntu.yml使用 tar 包:
oci2git fsbom -e tar image.tar -o image-bom.ymlfile、hardlink、symlink、directory)和状态(新建为 n:uid:gid,修改为 m:uid:gid)标记。已删除的文件(OCI whiteout)不会包含在内。layers:
- index: 0
command: "ADD rootfs.tar.gz / # buildkit"
digest: "sha256:45f3ea58..."
entries:
- type: file
path: "bin/busybox"
size: 919304
mode: 493
stat: "n:0:0"
- type: hardlink
path: "bin/sh"
target: "bin/busybox"
stat: "n:0:0"
- type: symlink
path: "lib64"
target: "lib"
stat: "n:0:0"
- index: 1
command: "RUN apk add --no-cache curl"
digest: "sha256:..."
entries:
- type: file
path: "usr/bin/curl"
size: 204800
mode: 493
stat: "n:0:0"
- type: file
path: "etc/apk/world"
size: 32
mode: 420
stat: "m:0:0"仓库结构
repository/
├── .git/
├── Image.md     # Complete image metadata
└── rootfs/      # Filesystem content from the container
要求
- Rust 2021 版本
- Docker CLI(用于 Docker 引擎支持)
- Git
许可证
MIT
[文档]: https://docs.rs/oci2git/
--- Tranlated By Open Ai Tx | Last indexed: 2026-04-02 ---