OCI2Git
[![]() ][documentation]
][documentation]


[//]: # (mock for future test.yaml) [//]: # ([](https://github.com/Virviil/oci2git/actions))
コンテナイメージ(Dockerなど)をGitリポジトリに変換し、ファイルシステムの部品表(fsbom)をYAML形式で生成するRustアプリケーションです。各コンテナレイヤーはGitコミットとして表現され、元のイメージの履歴と構造を保持します。

特徴
- Dockerイメージを解析し、レイヤー情報を抽出
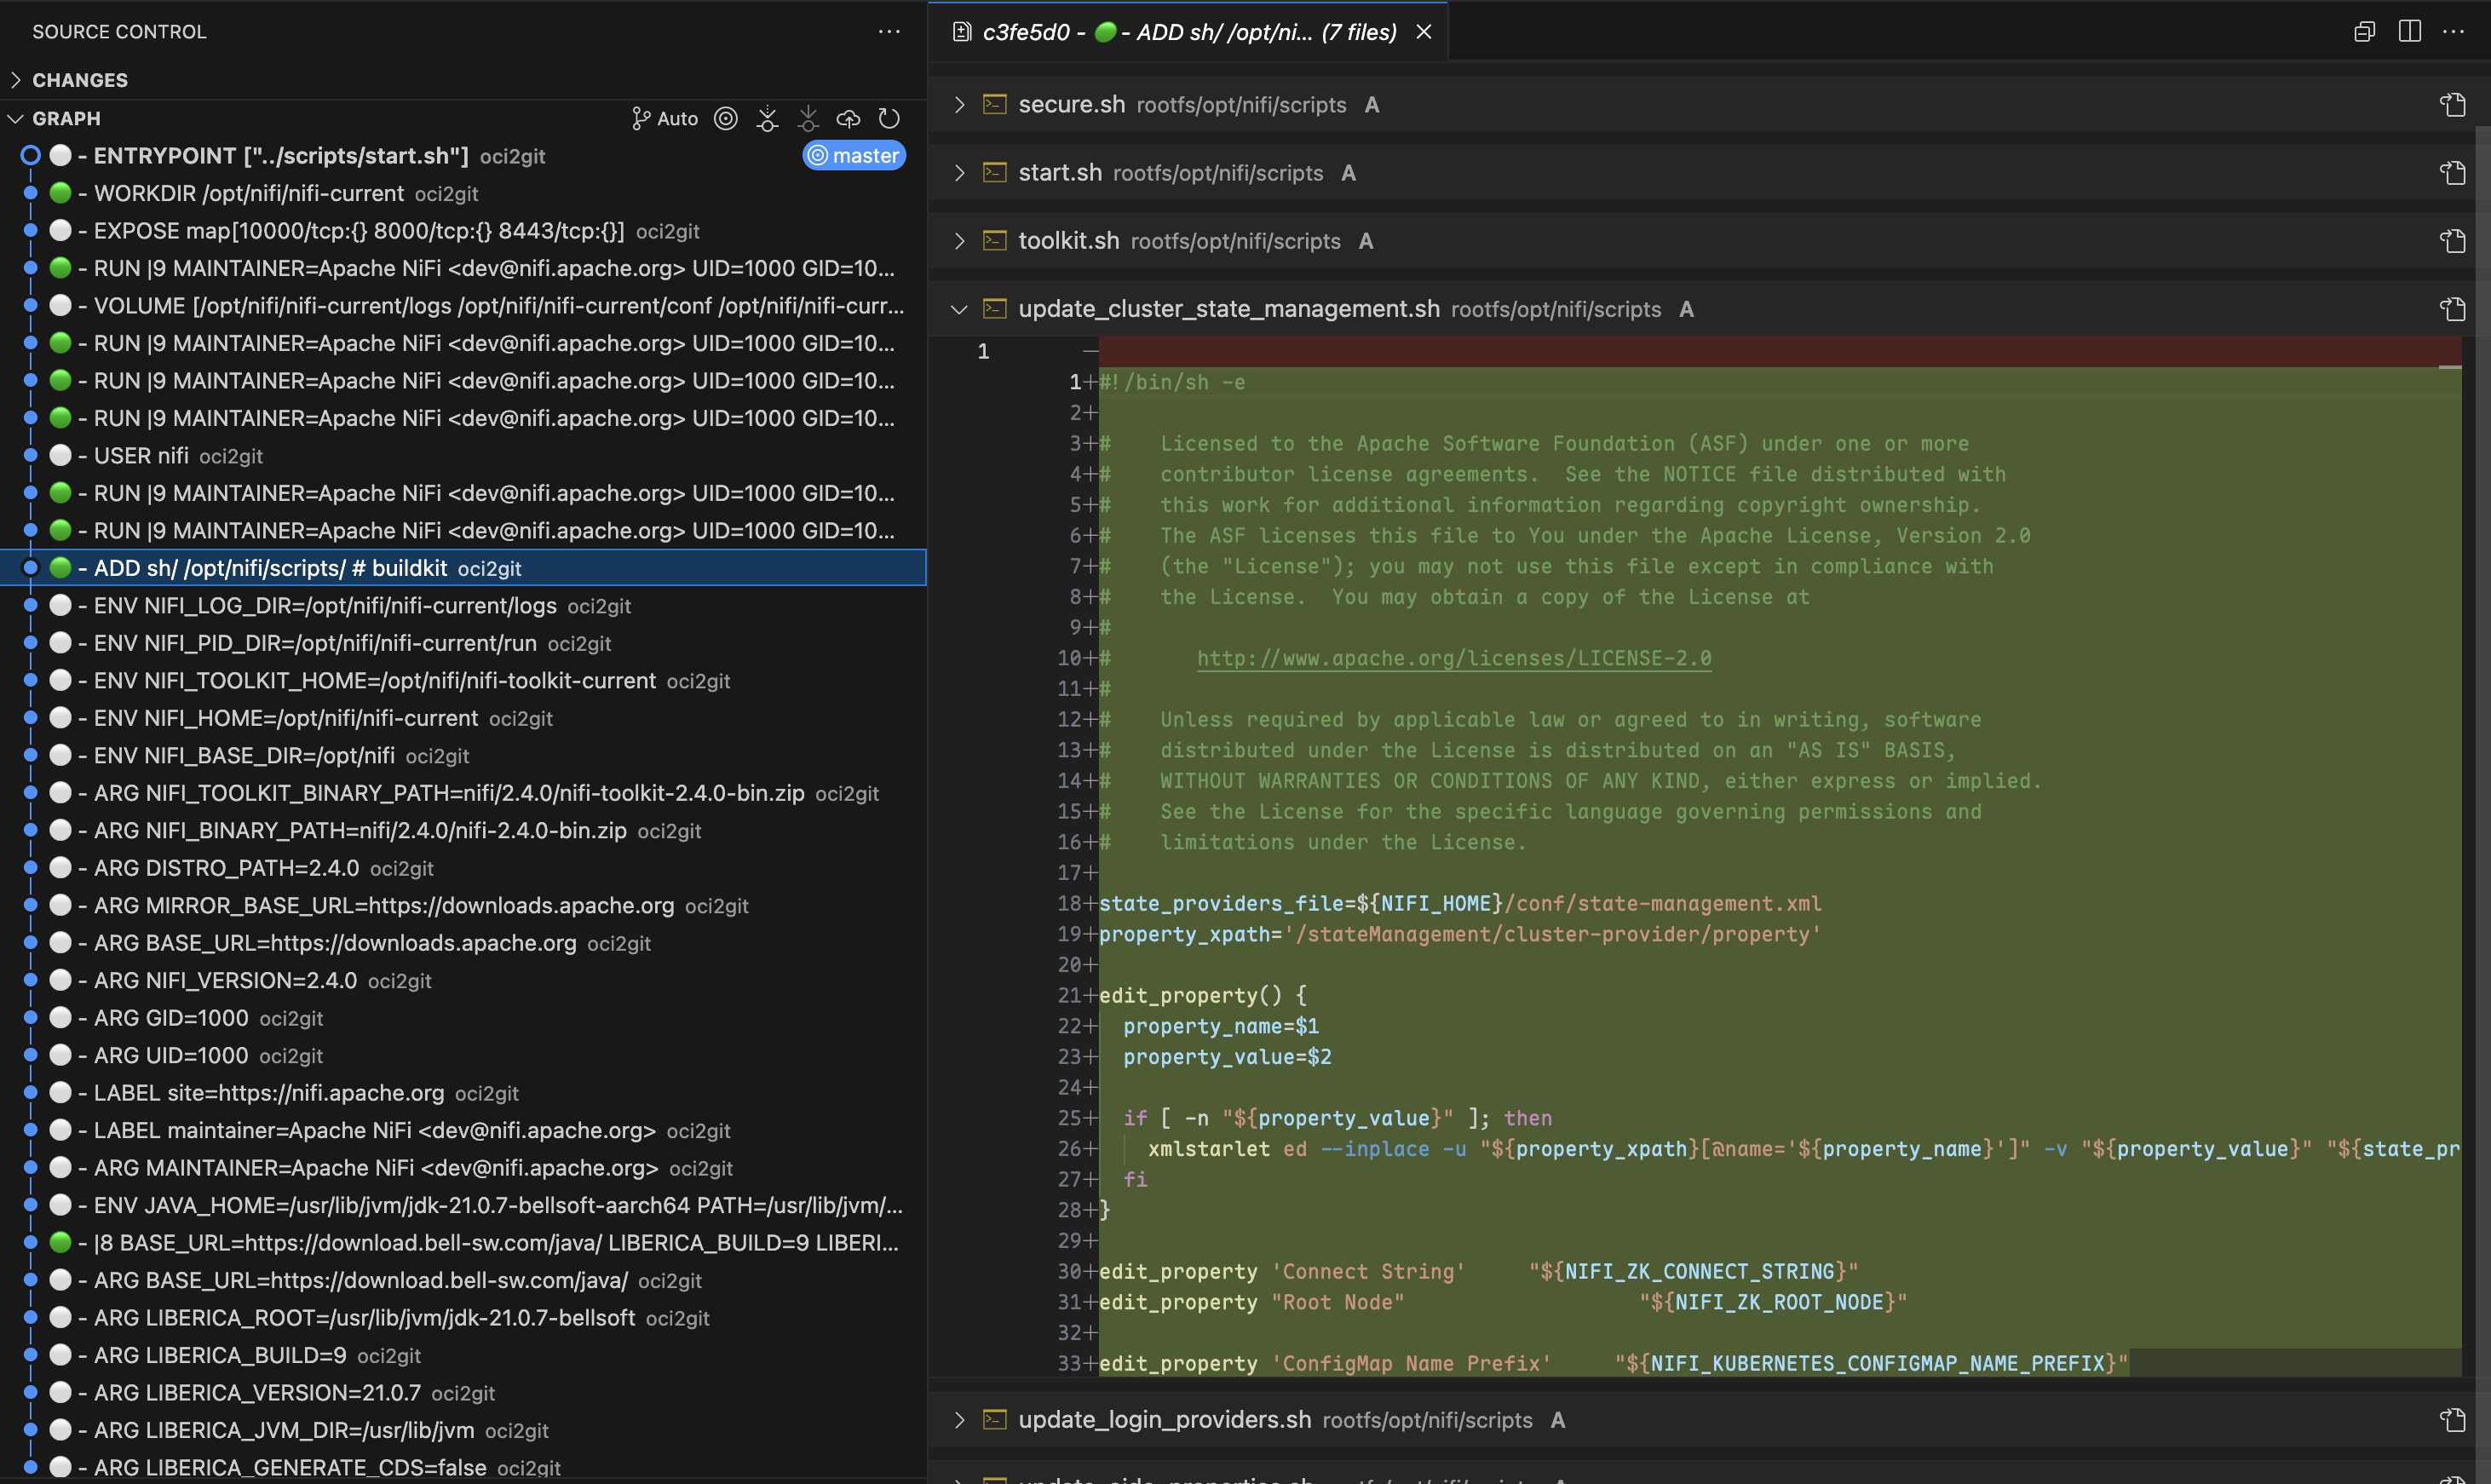
- 各イメージレイヤーをコミットとして表現するGitリポジトリを作成
- レイヤーごとのファイル一覧を含むYAML形式のファイルシステム部品表(fsbom)を生成
- 空レイヤー(ENV、WORKDIRなど)を空コミットとしてサポート
- メタデータをMarkdown形式で完全抽出
- 異なるコンテナエンジンに対応可能な拡張アーキテクチャ
利用例
レイヤー差分
コンテナのトラブルシューティング時、Gitの強力な差分機能を使って、任意の2つのレイヤー間で正確に何が変更されたかを特定できます。git diffでコミット間の差分を確認することで、どのファイルが追加・変更・削除されたかを明確に把握でき、各Dockerfile命令の影響や問題のある変更箇所を簡単に見つけることができます。
由来追跡
git blameを使うことで、特定のファイルやコード行がどのレイヤーで導入されたかをすぐに特定できます。これは設定ファイルや依存関係のトラブル解析時に特に有用です。全レイヤーを手動で調査することなく、任意のファイルの由来と対応するDockerfile命令を即座に特定できます。ファイルのライフサイクル追跡
OCI2Gitを使うことで、特定ファイルがコンテナイメージの履歴を通じてどのように変化したかを追跡できます。ファイルが最初に作成された時期、各レイヤーでどのように変更されたか、そして最終的に削除されたかどうかを観察できます。この包括的な視点により、多数のレイヤーにまたがる変更を手動で追うことなく、ファイルの進化を把握できます。コンテナイメージ内のファイルの履歴(初出・変更・削除時期など)を変換後に追跡するには、以下のGitコマンドが利用できます。
# Full history of a file (including renames)
git log --follow -- /rootfs/my/file/pathFirst appearance (i.e. creation) - see which layer introduced the file
git log --diff-filter=A -- /rootfs/my/file/pathAll changes made to the file (with diffs)
git log -p --follow -- /rootfs/my/file/pathWhen the file was deleted
git log --diff-filter=D -- /rootfs/my/file/pathShow short commit info (concise layer history)
git log --follow --oneline -- /rootfs/my/file/pathマルチレイヤー分析
時には、連続していない複数のレイヤー間の変更を調べることが最も洞察に富んだ比較をもたらします。OCI2Gitを使えば、Gitの比較ツールを利用して複数のビルドステージにわたるコンポーネントの進化を分析し、隣接するレイヤーだけを見ていると見えないパターンを特定できます。レイヤーの探索
git checkoutを使用して任意のコミットに移動することで、そのレイヤーの時点でのコンテナファイルシステムを正確に調べることができます。これにより、開発者はイメージ作成プロセスの任意の時点でのファイルやディレクトリの正確な状態を検査でき、デバッグやコンテナの動作検証時に非常に有用なコンテキストを提供します。
マルチイメージ分析
共通の起源を持つ複数のコンテナイメージを扱う場合、OCI2Gitは実際にイメージが分岐したときのみブランチを賢く作成します。これにより、共通の履歴を保持しつつ、単一のリポジトリ内で複数の関連イメージを分析できます。
# Convert first image to create the base repository
oci2git postgres:16.9-alpine3.21 -o alpConvert second image to the same output folder
oci2git nginx:1.28.0-alpine-slim -o alp- すべての共有レイヤーを含む共通の幹
- 実際にイメージが異なる場合のみ分岐する個別のブランチ
- イメージがどこで共通の祖先を持ち、どこでユニークになるかの明確な可視化
- スマートな重複処理:全く同じイメージが2回処理された場合、アルゴリズムは最終的なメタデータコミット前にこれを検出し、重複ブランチの作成をスキップします
- イメージファミリー分析:イメージの異なるバリアント(バージョン、アーキテクチャ、設定)がどのように相互に関連しているかの理解
- ベースイメージの影響:ベースイメージの変更が複数の派生イメージにどのように影響するかを正確に把握
- 最適化の機会:イメージバリアント間でより有効活用できる共有コンポーネントの特定

追加ユースケース
- セキュリティ監査:脆弱なパッケージや設定がいつ導入されたかを正確に特定し、それを特定のビルド命令まで遡ることができます。
- イメージ最適化:レイヤー構造を分析し、冗長な操作や統合可能な大きなファイルを特定してイメージサイズの削減に役立てます。
- 依存関係管理:イメージ履歴全体で依存関係が追加、アップグレード、削除されたタイミングを監視します。
- ビルドプロセス改善:レイヤー構成を検証し、より良いキャッシュや小さいイメージサイズのためにDockerfile命令を最適化します。
- クロスイメージ比較:複数の関連イメージをGitリポジトリに変換し、Gitの比較ツールを使って相違点や共通点を分析します。
インストール
パッケージマネージャー
#### macOS / Linux(Homebrew)
brew tap virviil/oci2git
brew install oci2git
#### Debian / Ubuntu
最新リリースから.debパッケージをダウンロードしてインストールします。
# For amd64 (x86_64)
wget https://github.com/virviil/oci2git/releases/latest/download/oci2git_VERSION_amd64.deb
sudo dpkg -i oci2git_VERSION_amd64.debFor arm64
wget https://github.com/virviil/oci2git/releases/latest/download/oci2git_VERSION_arm64.deb
sudo dpkg -i oci2git_VERSION_arm64.deb
#### Arch Linux(AUR)
# Using yay
yay -S oci2git-binUsing paru
paru -S oci2git-binManual installation
git clone https://aur.archlinux.org/oci2git-bin.git
cd oci2git-bin
makepkg -si
事前構築済みバイナリ
ご利用のプラットフォームに適したバイナリを最新リリースからダウンロードしてください:
# Linux x86_64
wget https://github.com/virviil/oci2git/releases/latest/download/oci2git-linux-x86_64.tar.gz
tar xzf oci2git-linux-x86_64.tar.gz
sudo mv oci2git-linux-x86_64 /usr/local/bin/oci2git
chmod +x /usr/local/bin/oci2gitmacOS (Apple Silicon)
wget https://github.com/virviil/oci2git/releases/latest/download/oci2git-darwin-aarch64.tar.gz
tar xzf oci2git-darwin-aarch64.tar.gz
sudo mv oci2git-darwin-aarch64 /usr/local/bin/oci2git
chmod +x /usr/local/bin/oci2git
Crates.ioからの入手方法
cargo install oci2gitソースから
# Clone the repository
git clone https://github.com/virviil/oci2git.git
cd oci2gitInstall locally
cargo install --path .
使用方法
oci2git [OPTIONS]
oci2git convert [OPTIONS]
oci2git fsbom [OPTIONS]
convert — OCIイメージ → Gitリポジトリ
oci2git convert [OPTIONS]
or simply:
oci2git
オプション:
-o, --output Gitリポジトリの出力ディレクトリ [デフォルト: ./container_repo]
-e, --engine 使用するコンテナエンジン (docker, nerdctl, tar) [デフォルト: docker]
-v, --verbose 冗長モード (-vは情報、-vvはデバッグ、-vvvはトレース)
fsbom — ファイルシステム部品表
oci2git fsbom [OPTIONS] オプション:
-o, --output YAML BOM ファイルの出力パス [デフォルト: ./fsbom.yml]
-e, --engine 使用するコンテナエンジン (docker, nerdctl, tar) [デフォルト: docker]
-v, --verbose 詳細モード (-v は情報, -vv はデバッグ, -vvv はトレース)
環境変数:
TMPDIR この環境変数を設定すると、中間データ処理に使用するデフォルトの場所を変更できます。これはプラットフォーム依存です(例:Unix/macOS では TMPDIR、Windows では TEMP または TMP)。
使用例
変換
Docker エンジンを使用(デフォルト):
oci2git ubuntu:latest
or explicitly:
oci2git convert ubuntu:latest -o ./ubuntu-repo
すでにダウンロードされたイメージtarballを使用する場合:
oci2git convert -e tar -o ./ubuntu-repo /path/to/ubuntu-latest.tardocker saveで作成されます:# Create a tarball from a local Docker image
docker save -o ubuntu-latest.tar ubuntu:latestConvert the tarball to a Git repository
oci2git convert -e tar -o ./ubuntu-repo ubuntu-latest.tarこれにより、./ubuntu-repo に Git リポジトリが作成され、以下の内容が含まれます:
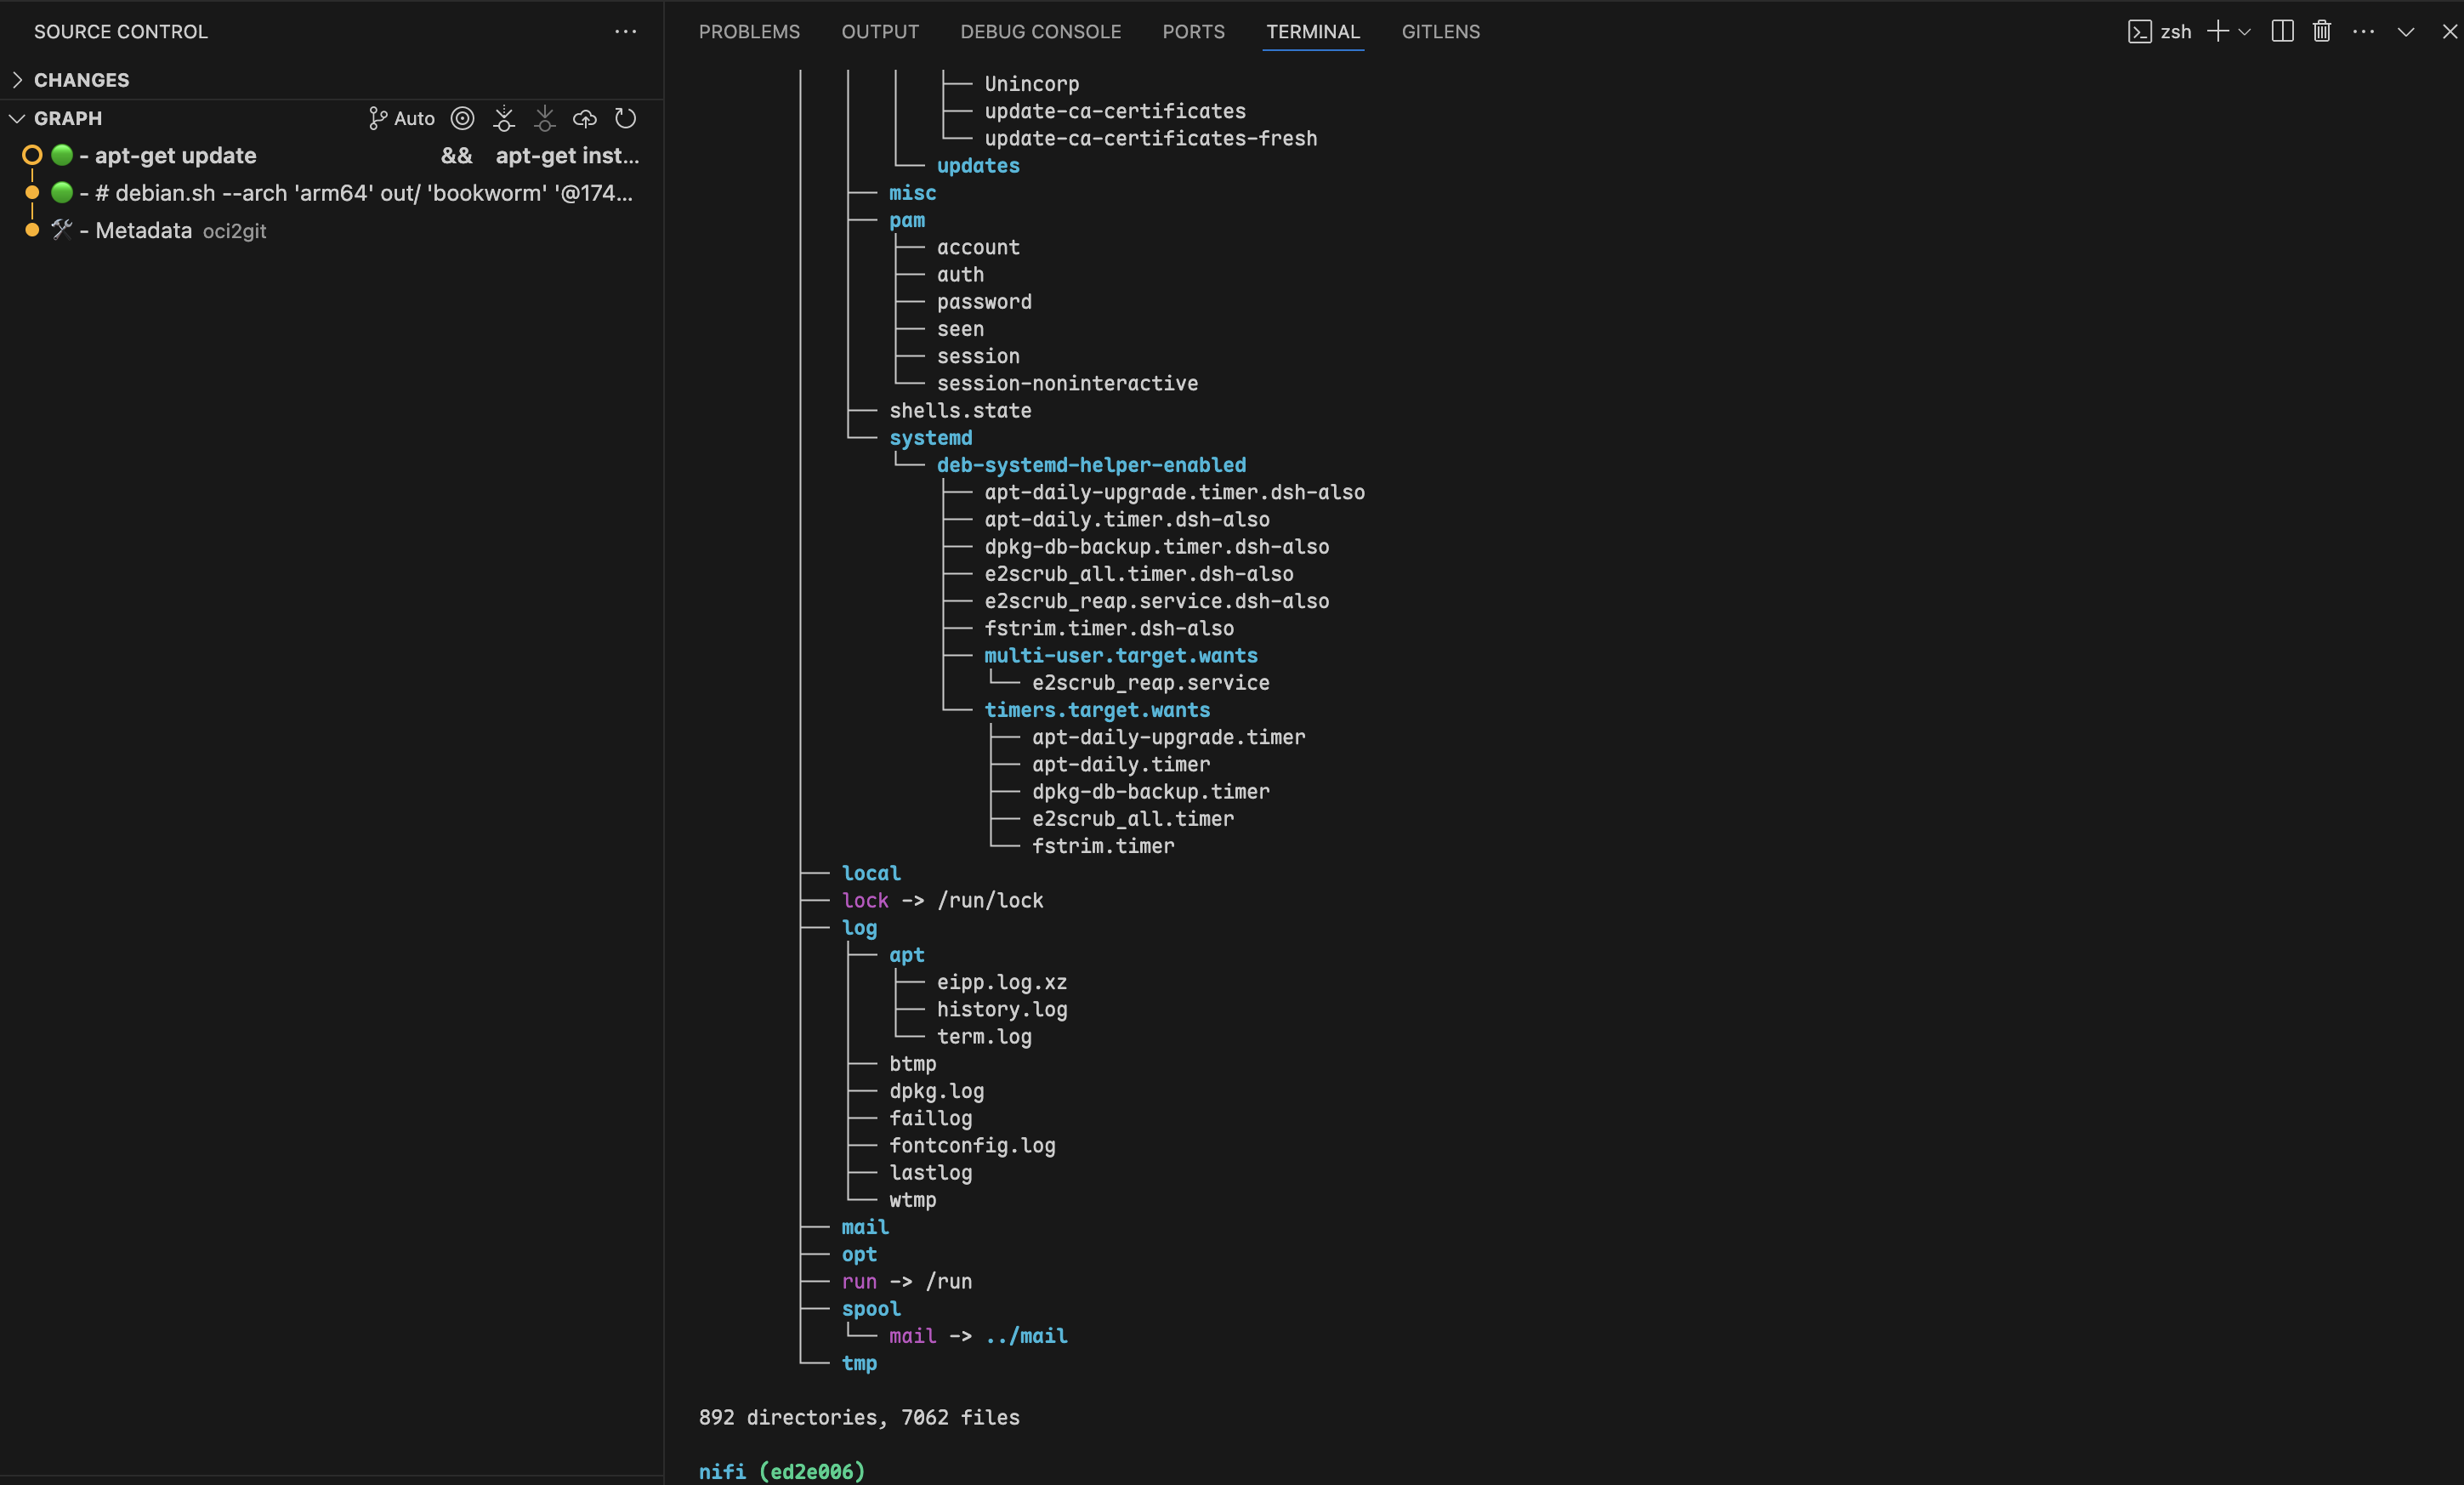
Image.md- イメージに関する完全なメタデータ(Markdown形式)rootfs/- コンテナから取得したファイルシステム内容
- 最初のコミットにはメタデータを完全に記載した
Image.mdファイルのみが含まれます - 以降の各コミットは元のイメージのレイヤーを表します
- コミットメッセージには Dockerfile のコマンドが含まれます
ファイルシステム部品表(fsbom)
各レイヤーごとに導入または変更された全ファイルを YAML 形式で生成します:
oci2git fsbom ubuntu:latest -o ubuntu.ymltarボールの使用:
oci2git fsbom -e tar image.tar -o image-bom.ymlfile、hardlink、symlink、directory)とステータス(新規は n:uid:gid、変更は m:uid:gid)でタグ付けします。
削除されたファイル(OCIホワイトアウト)は除外されます。layers:
- index: 0
command: "ADD rootfs.tar.gz / # buildkit"
digest: "sha256:45f3ea58..."
entries:
- type: file
path: "bin/busybox"
size: 919304
mode: 493
stat: "n:0:0"
- type: hardlink
path: "bin/sh"
target: "bin/busybox"
stat: "n:0:0"
- type: symlink
path: "lib64"
target: "lib"
stat: "n:0:0"
- index: 1
command: "RUN apk add --no-cache curl"
digest: "sha256:..."
entries:
- type: file
path: "usr/bin/curl"
size: 204800
mode: 493
stat: "n:0:0"
- type: file
path: "etc/apk/world"
size: 32
mode: 420
stat: "m:0:0"リポジトリ構成
repository/
├── .git/
├── Image.md     # Complete image metadata
└── rootfs/      # Filesystem content from the container
必要条件
- Rust 2021 エディション
- Docker CLI(Docker エンジン対応)
- Git
ライセンス
MIT
[documentation]: https://docs.rs/oci2git/
--- Tranlated By Open Ai Tx | Last indexed: 2026-04-02 ---