OCI2Git
[![]() ][documentation]
][documentation]


[//]: # (mock for future test.yaml) [//]: # ([](https://github.com/Virviil/oci2git/actions))
A Rust application that converts container images (Docker, etc.) to Git repositories, and generates filesystem bill of materials (fsbom) in YAML. Each container layer is represented as a Git commit, preserving the history and structure of the original image.

Features
- Analyze Docker images and extract layer information
- Create a Git repository where each image layer is represented as a commit
- Generate a YAML filesystem bill of materials (fsbom) with per-layer file listings
- Support for empty layers (ENV, WORKDIR, etc.) as empty commits
- Complete metadata extraction to Markdown format
- Extensible architecture for supporting different container engines
Use Cases
Layer Diffing
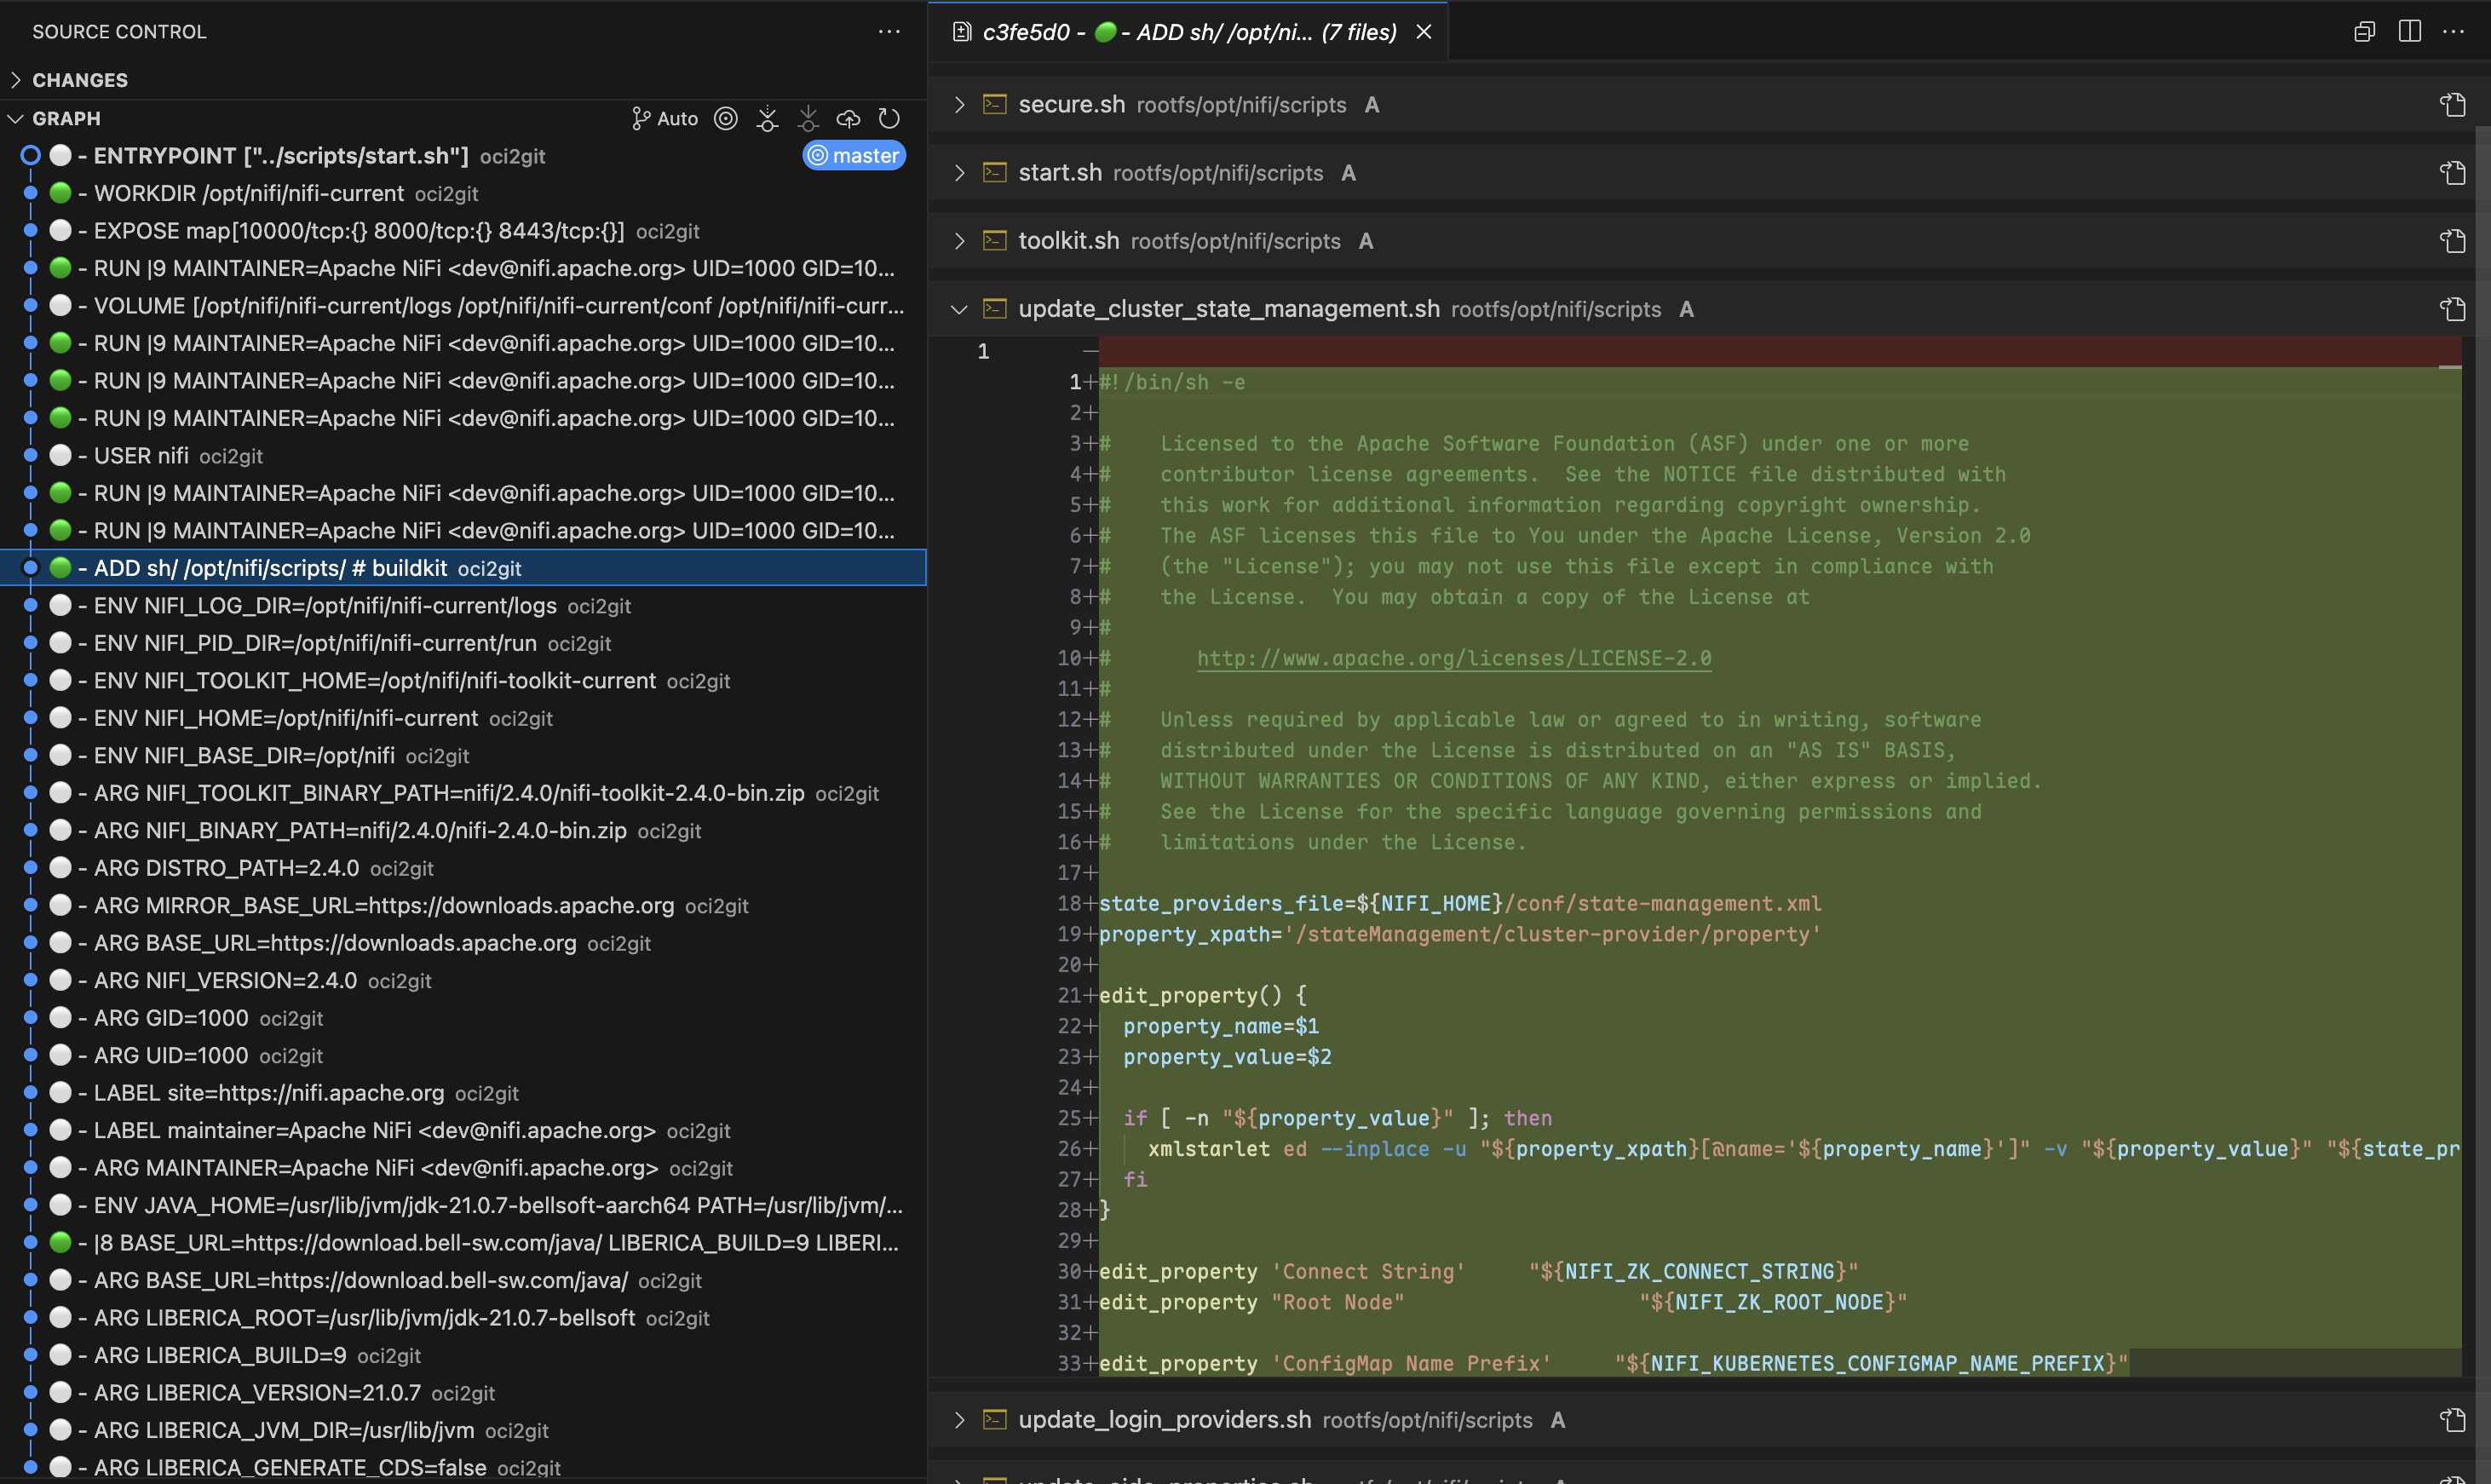
When troubleshooting container issues, you can use Git's powerful diffing capabilities to identify exactly what changed between any two layers. By runninggit diff between commits, engineers can see precisely which files were added, modified, or deleted, making it much easier to understand the impact of each Dockerfile instruction and locate problematic changes.
Origin Tracking
Usinggit blame, developers can quickly determine which layer introduced a specific file or line of code. This is particularly valuable when diagnosing issues with configuration files or dependencies. Instead of manually inspecting each layer, you can immediately trace the origin of any file back to its source layer and corresponding Dockerfile instruction.File Lifecycle Tracking
OCI2Git enables you to follow a specific file's journey throughout the container image's history. You can observe when a file was initially created, how it was modified across layers, and if/when it was eventually removed. This comprehensive view helps understand file evolution without having to manually track changes across potentially dozens of layers.To track the history of a file in your container image — including when it first appeared, was changed, or deleted — you can use these Git commands after conversion:
# Full history of a file (including renames)
git log --follow -- /rootfs/my/file/pathFirst appearance (i.e. creation) - see which layer introduced the file
git log --diff-filter=A -- /rootfs/my/file/pathAll changes made to the file (with diffs)
git log -p --follow -- /rootfs/my/file/pathWhen the file was deleted
git log --diff-filter=D -- /rootfs/my/file/pathShow short commit info (concise layer history)
git log --follow --oneline -- /rootfs/my/file/pathMulti-Layer Analysis
Sometimes the most insightful comparisons come from examining changes across multiple non-consecutive layers. With OCI2Git, you can use Git's comparison tools to analyze how components evolved over multiple build stages, identifying patterns that might be invisible when looking only at adjacent layers.Layer Exploration
By usinggit checkout to move to any specific commit, you can examine the container filesystem exactly as it existed at that layer. This allows developers to inspect the precise state of files and directories at any point in the image's creation process, providing invaluable context when debugging or examining container behavior.
Multi-Image Analysis
When working with multiple container images that share common ancestry, OCI2Git intelligently creates branches only when the images actually diverge. This allows you to analyze multiple related images in a single repository while preserving their common history.
# Convert first image to create the base repository
oci2git postgres:16.9-alpine3.21 -o alpConvert second image to the same output folder
oci2git nginx:1.28.0-alpine-slim -o alp
OCI2Git automatically detects shared layers between images and creates a branching structure that reflects their common base. The Git history will show:
- A common trunk containing all shared layers
- Separate branches that diverge only when the images actually differ
- Clear visualization of where images share common ancestry vs. where they become unique
- Smart duplicate handling: if the exact same image is processed twice, the algorithm detects this before the final metadata commit and skips creating a duplicate branch
- Image Family Analysis: Understanding how different variants of an image (different versions, architectures, or configurations) relate to each other
- Base Image Impact: Seeing exactly how changes to a base image affect multiple derived images
- Optimization Opportunities: Identifying shared components that could be better leveraged across image variants

Additional Use Cases
- Security Auditing: Identify exactly when vulnerable packages or configurations were introduced and trace them back to specific build instructions.
- Image Optimization: Analyze layer structures to find redundant operations or large files that could be consolidated, helping to reduce image size.
- Dependency Management: Monitor when dependencies were added, upgraded, or removed across the image history.
- Build Process Improvement: Examine layer composition to optimize Dockerfile instructions for better caching and smaller image size.
- Cross-Image Comparison: Convert multiple related images to Git repositories and use Git's comparison tools to analyze their differences and commonalities.
Installation
Package Managers
#### macOS / Linux (Homebrew)
brew tap virviil/oci2git
brew install oci2git
#### Debian / Ubuntu
Download and install the .deb package from the latest release:
# For amd64 (x86_64)
wget https://github.com/virviil/oci2git/releases/latest/download/oci2git_VERSION_amd64.deb
sudo dpkg -i oci2git_VERSION_amd64.debFor arm64
wget https://github.com/virviil/oci2git/releases/latest/download/oci2git_VERSION_arm64.deb
sudo dpkg -i oci2git_VERSION_arm64.deb
#### Arch Linux (AUR)
# Using yay
yay -S oci2git-binUsing paru
paru -S oci2git-binManual installation
git clone https://aur.archlinux.org/oci2git-bin.git
cd oci2git-bin
makepkg -si
Pre-built Binaries
Download the appropriate binary for your platform from the latest release:
# Linux x86_64
wget https://github.com/virviil/oci2git/releases/latest/download/oci2git-linux-x86_64.tar.gz
tar xzf oci2git-linux-x86_64.tar.gz
sudo mv oci2git-linux-x86_64 /usr/local/bin/oci2git
chmod +x /usr/local/bin/oci2gitmacOS (Apple Silicon)
wget https://github.com/virviil/oci2git/releases/latest/download/oci2git-darwin-aarch64.tar.gz
tar xzf oci2git-darwin-aarch64.tar.gz
sudo mv oci2git-darwin-aarch64 /usr/local/bin/oci2git
chmod +x /usr/local/bin/oci2git
From Crates.io
cargo install oci2gitFrom Source
# Clone the repository
git clone https://github.com/virviil/oci2git.git
cd oci2gitInstall locally
cargo install --path .
Usage
oci2git [OPTIONS]
oci2git convert [OPTIONS]
oci2git fsbom [OPTIONS]
convert — OCI image → Git repository
oci2git convert [OPTIONS]
or simply:
oci2git
Options:
-o, --output Output directory for Git repository [default: ./container_repo]
-e, --engine Container engine to use (docker, nerdctl, tar) [default: docker]
-v, --verbose Verbose mode (-v for info, -vv for debug, -vvv for trace)
fsbom — Filesystem bill of materials
oci2git fsbom [OPTIONS] Options:
-o, --output Output path for the YAML BOM file [default: ./fsbom.yml]
-e, --engine Container engine to use (docker, nerdctl, tar) [default: docker]
-v, --verbose Verbose mode (-v for info, -vv for debug, -vvv for trace)
Environment Variables:
TMPDIR Set this environment variable to change the default location used for intermediate data processing. This is platform-dependent (e.g., TMPDIR on Unix/macOS, TEMP or TMP on Windows).
Examples
Convert
Using Docker engine (default):
oci2git ubuntu:latest
or explicitly:
oci2git convert ubuntu:latest -o ./ubuntu-repo
Using an already downloaded image tarball:
oci2git convert -e tar -o ./ubuntu-repo /path/to/ubuntu-latest.tarThe tar engine expects a valid OCI format tarball, which is typically created with docker save:
# Create a tarball from a local Docker image
docker save -o ubuntu-latest.tar ubuntu:latestConvert the tarball to a Git repository
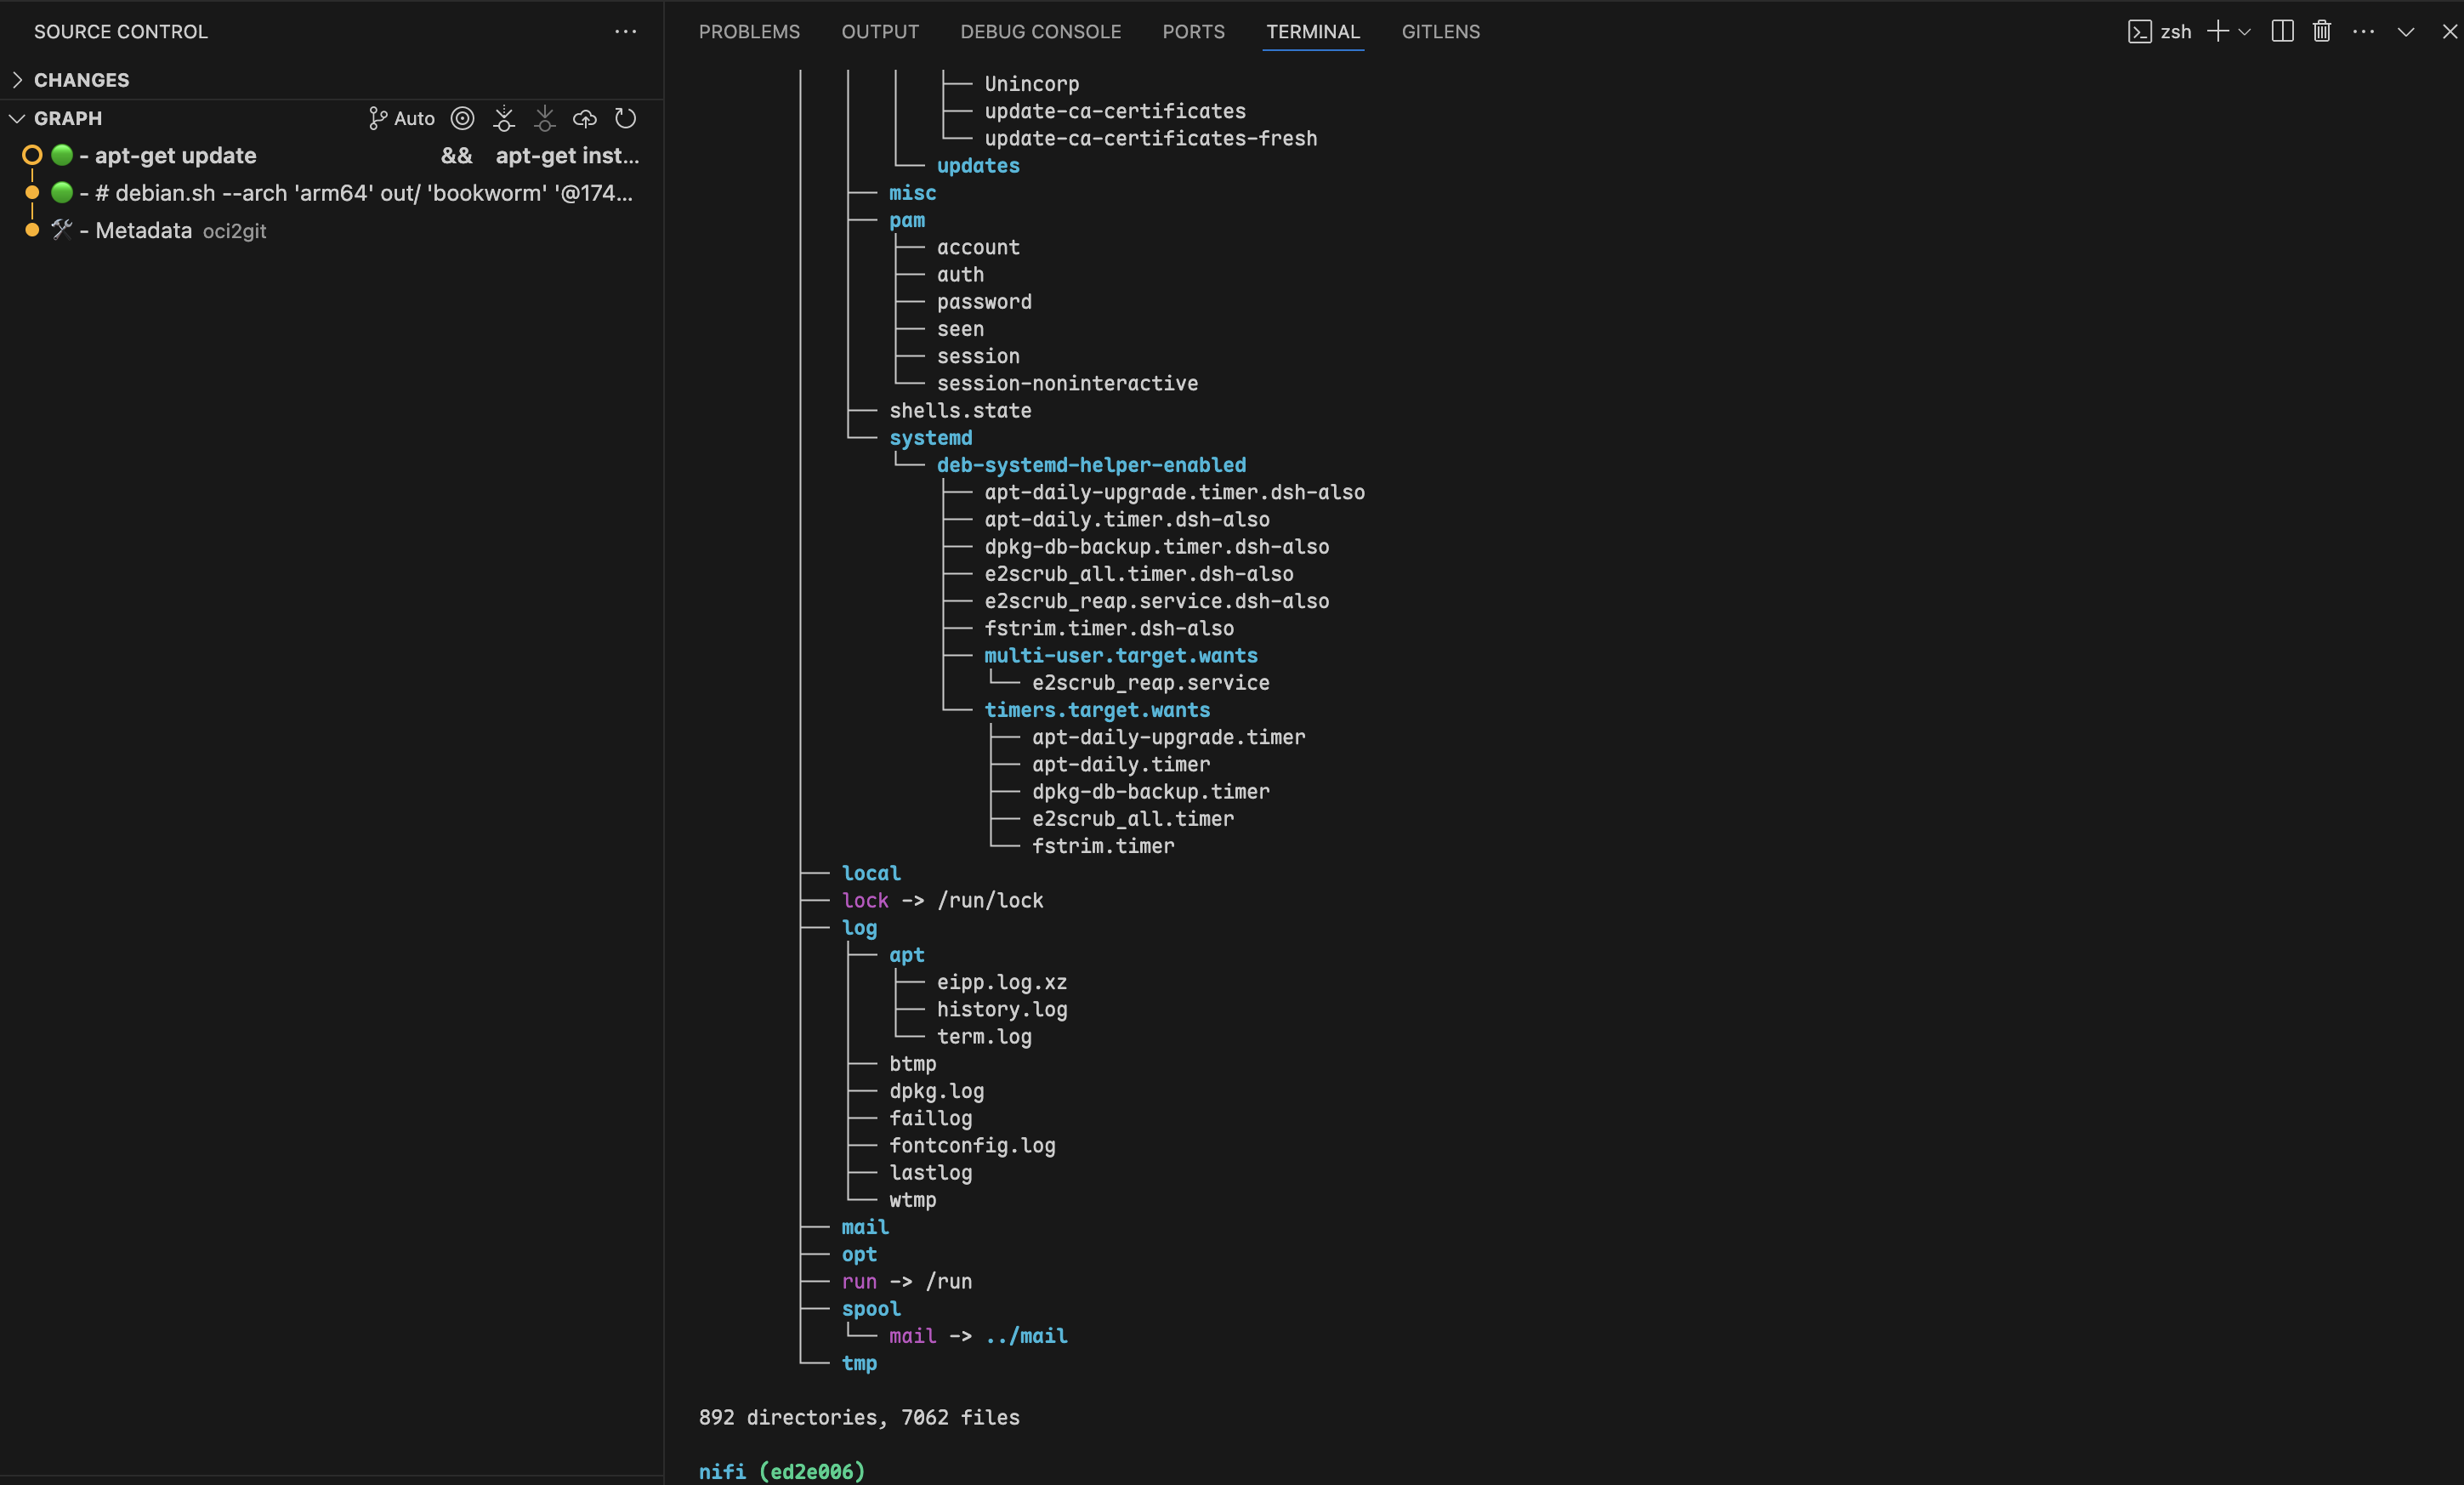
oci2git convert -e tar -o ./ubuntu-repo ubuntu-latest.tarThis will create a Git repository in ./ubuntu-repo containing:
Image.md- Complete metadata about the image in Markdown formatrootfs/- The filesystem content from the container
- The first commit contains only the
Image.mdfile with full metadata - Each subsequent commit represents a layer from the original image
- Commits include the Dockerfile command as the commit message
Filesystem Bill of Materials (fsbom)
Generate a YAML listing of every file introduced or modified per layer:
oci2git fsbom ubuntu:latest -o ubuntu.ymlUsing a tarball:
oci2git fsbom -e tar image.tar -o image-bom.ymlThe output YAML lists every layer with its entries tagged by type (file, hardlink, symlink, directory) and status (n:uid:gid for new, m:uid:gid for modified). Deleted files (OCI whiteouts) are excluded.
layers:
- index: 0
command: "ADD rootfs.tar.gz / # buildkit"
digest: "sha256:45f3ea58..."
entries:
- type: file
path: "bin/busybox"
size: 919304
mode: 493
stat: "n:0:0"
- type: hardlink
path: "bin/sh"
target: "bin/busybox"
stat: "n:0:0"
- type: symlink
path: "lib64"
target: "lib"
stat: "n:0:0"
- index: 1
command: "RUN apk add --no-cache curl"
digest: "sha256:..."
entries:
- type: file
path: "usr/bin/curl"
size: 204800
mode: 493
stat: "n:0:0"
- type: file
path: "etc/apk/world"
size: 32
mode: 420
stat: "m:0:0"Repository Structure
repository/
├── .git/
├── Image.md     # Complete image metadata
└── rootfs/      # Filesystem content from the container
Requirements
- Rust 2021 edition
- Docker CLI (for Docker engine support)
- Git
License
MIT
[documentation]: https://docs.rs/oci2git/
--- Tranlated By Open Ai Tx | Last indexed: 2026-04-02 ---